How can I send a campaign using the Audience Segment?
This guide provides clear instructions on sending a campaign using audience segments, enabling personalized messaging to targeted groups.
Step 1: Access the Campaigns Tab
Log in to Conversive.
Navigate to the Campaigns tab to get started.
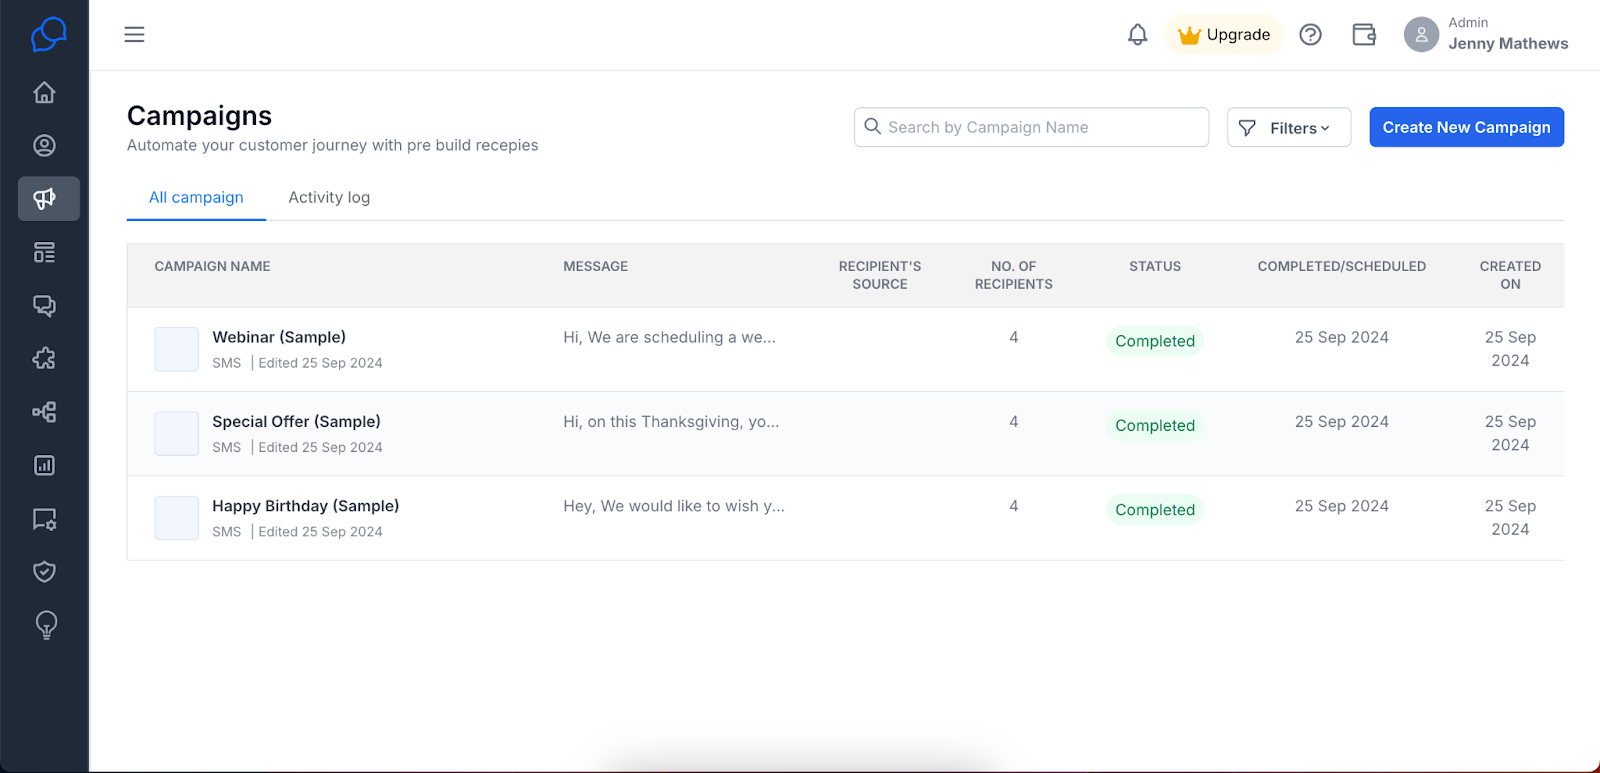
Step 2: Create a New Campaign
Click on Create New Campaign to initiate the campaign creation process.

Step 3: Define Your Campaign
Fill in the necessary campaign details:
Campaign Name: Enter a descriptive name for your campaign.
Description: Provide a brief overview of what the campaign is about.
Channel: Select the communication channel (e.g., SMS, email).
Sender ID: Choose the sender ID for the campaign.
Campaign Type: Specify the type of campaign you are creating.
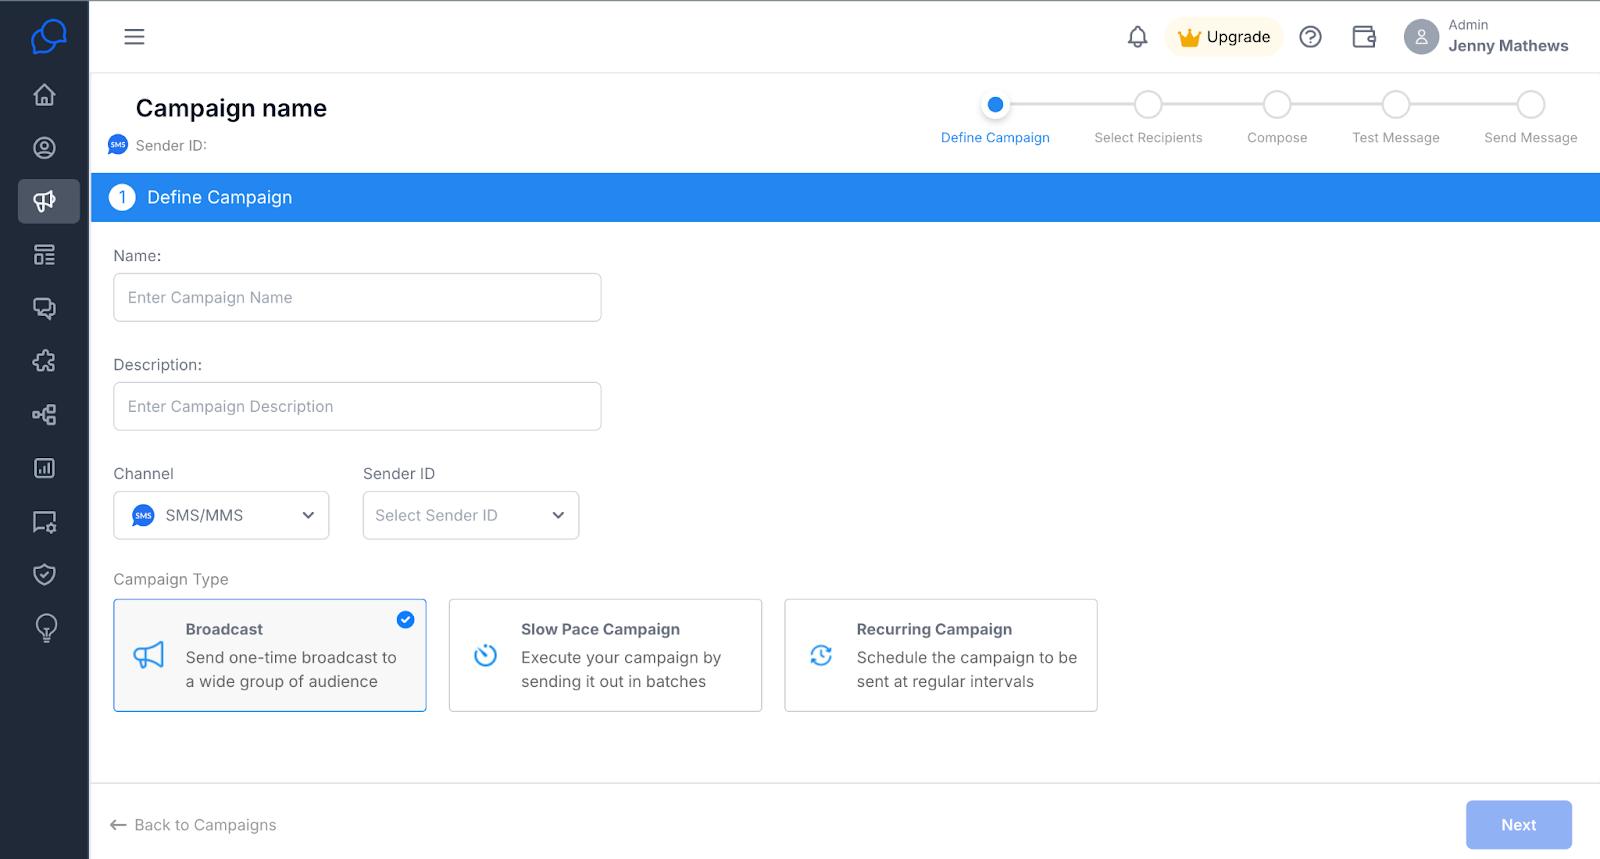
Step 4: Move to the Recipient Selection
Click Next to proceed to the recipient selection step.
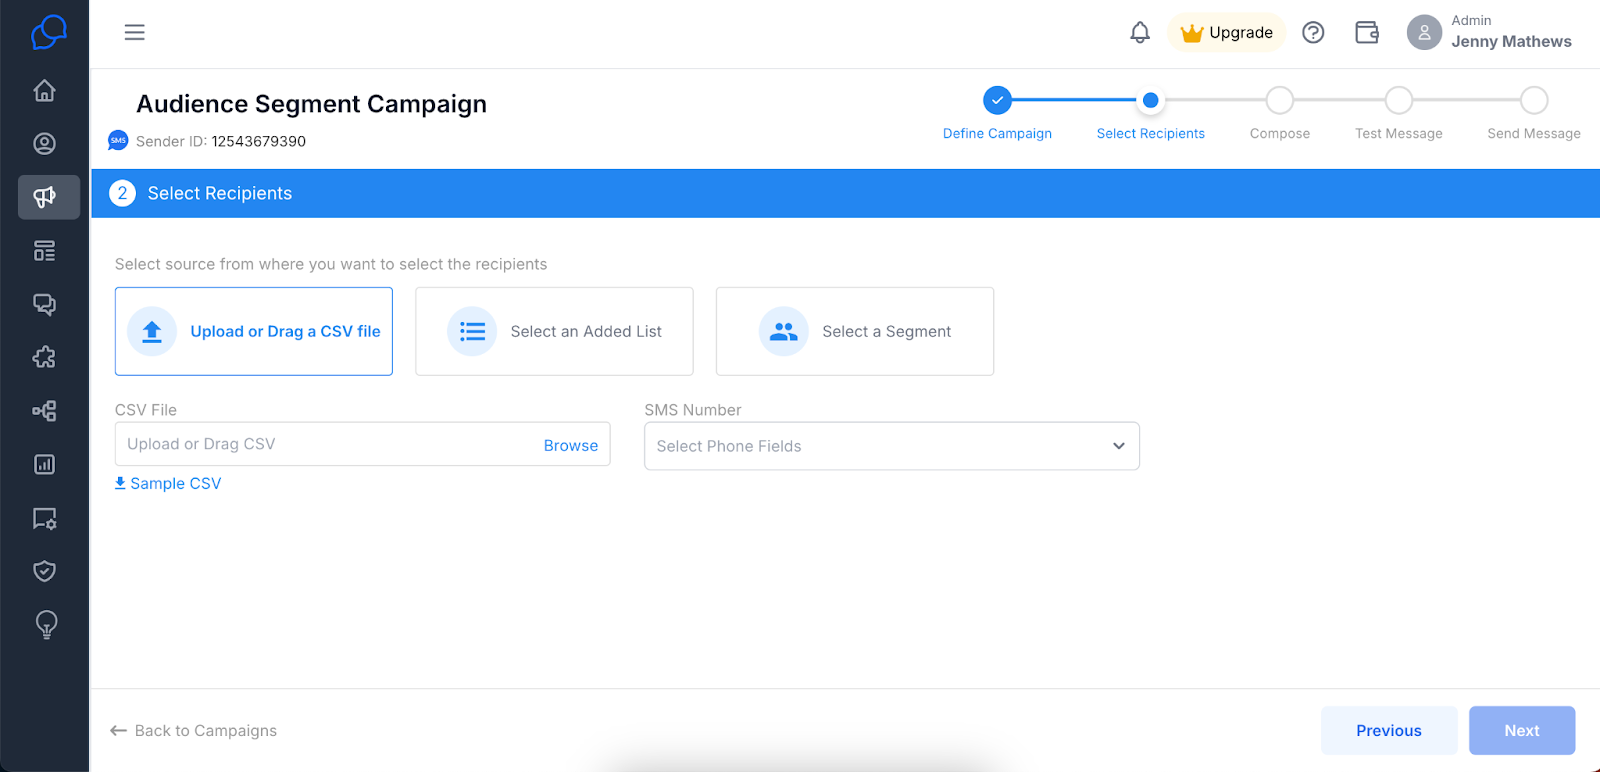
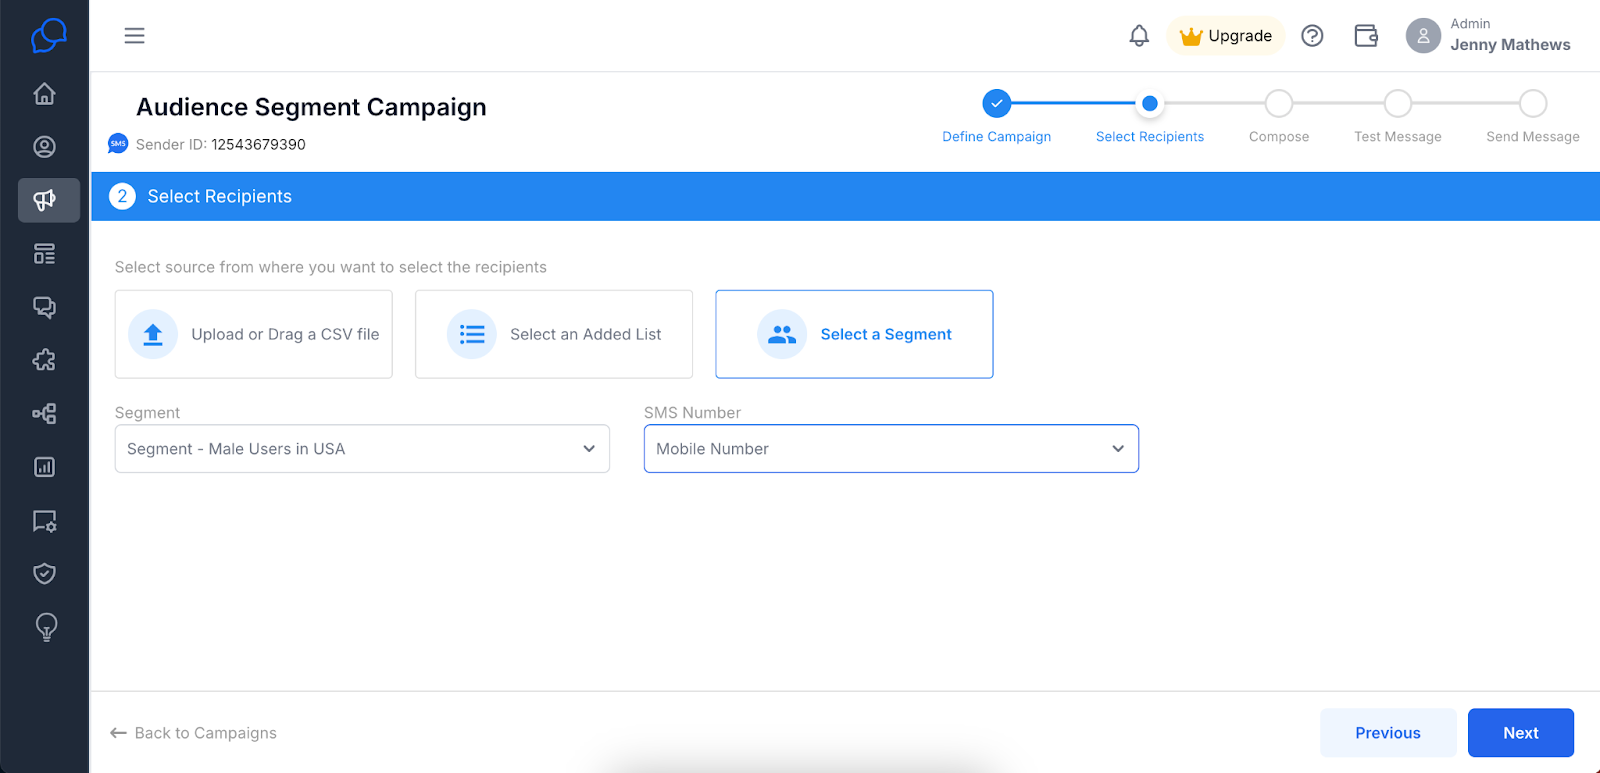
Step 5: Select Recipients from Audience Segments
In the Select Recipient section, click on Select a Segment.
This allows you to choose the audience segment you want to target with your campaign.
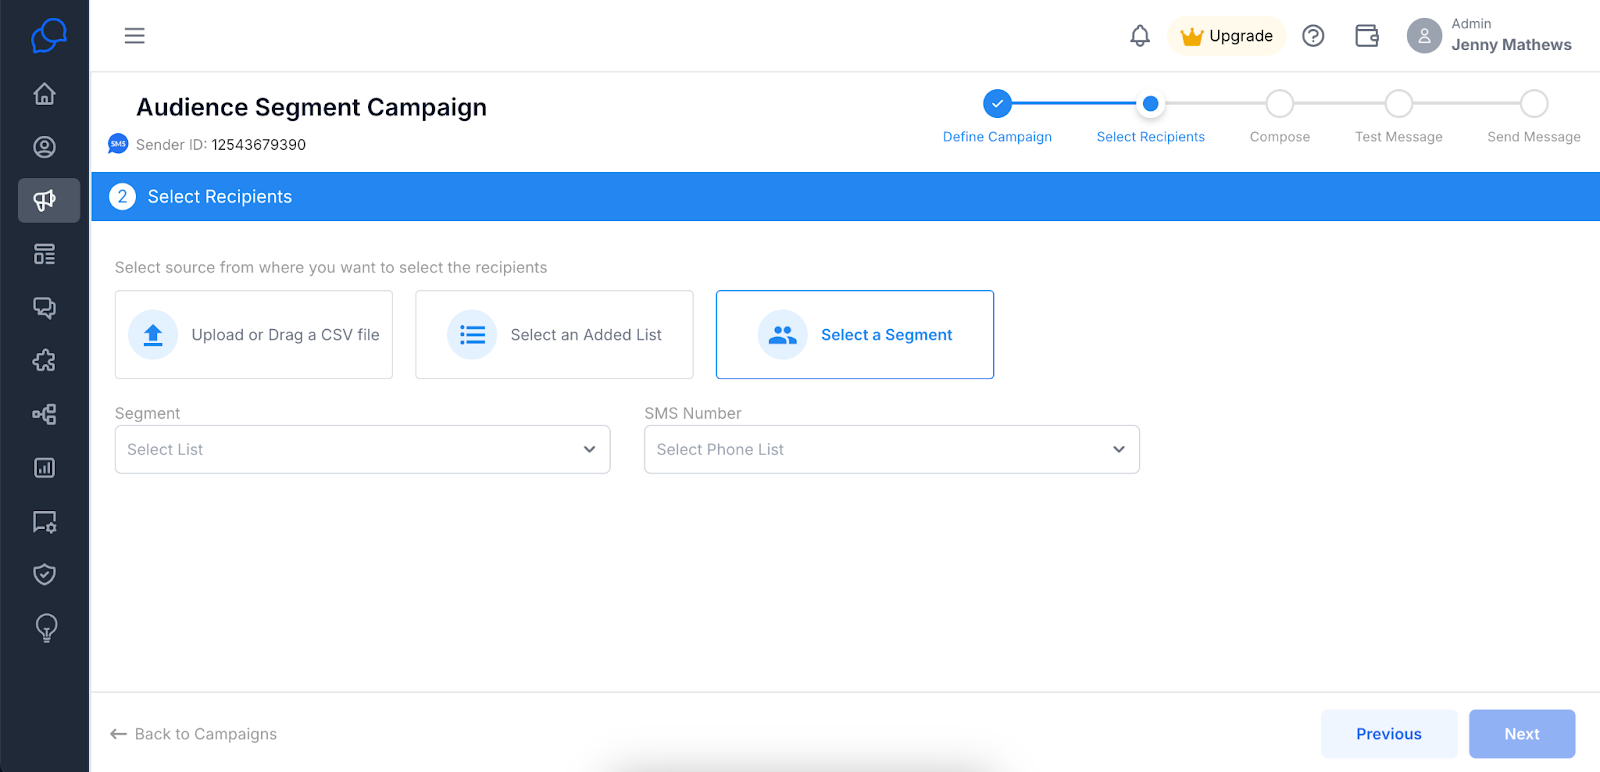
Step 6: Choose Your Desired Segment
After clicking Select a Segment, a list of available audience segments will appear.
Click on Select List to choose the specific segment to which you wish to send the campaign.
Once the segment is selected, choose the Phone List to include it in the campaign.
Step 7: Continue to the Template Selection
Click Next to proceed to the template selection step.
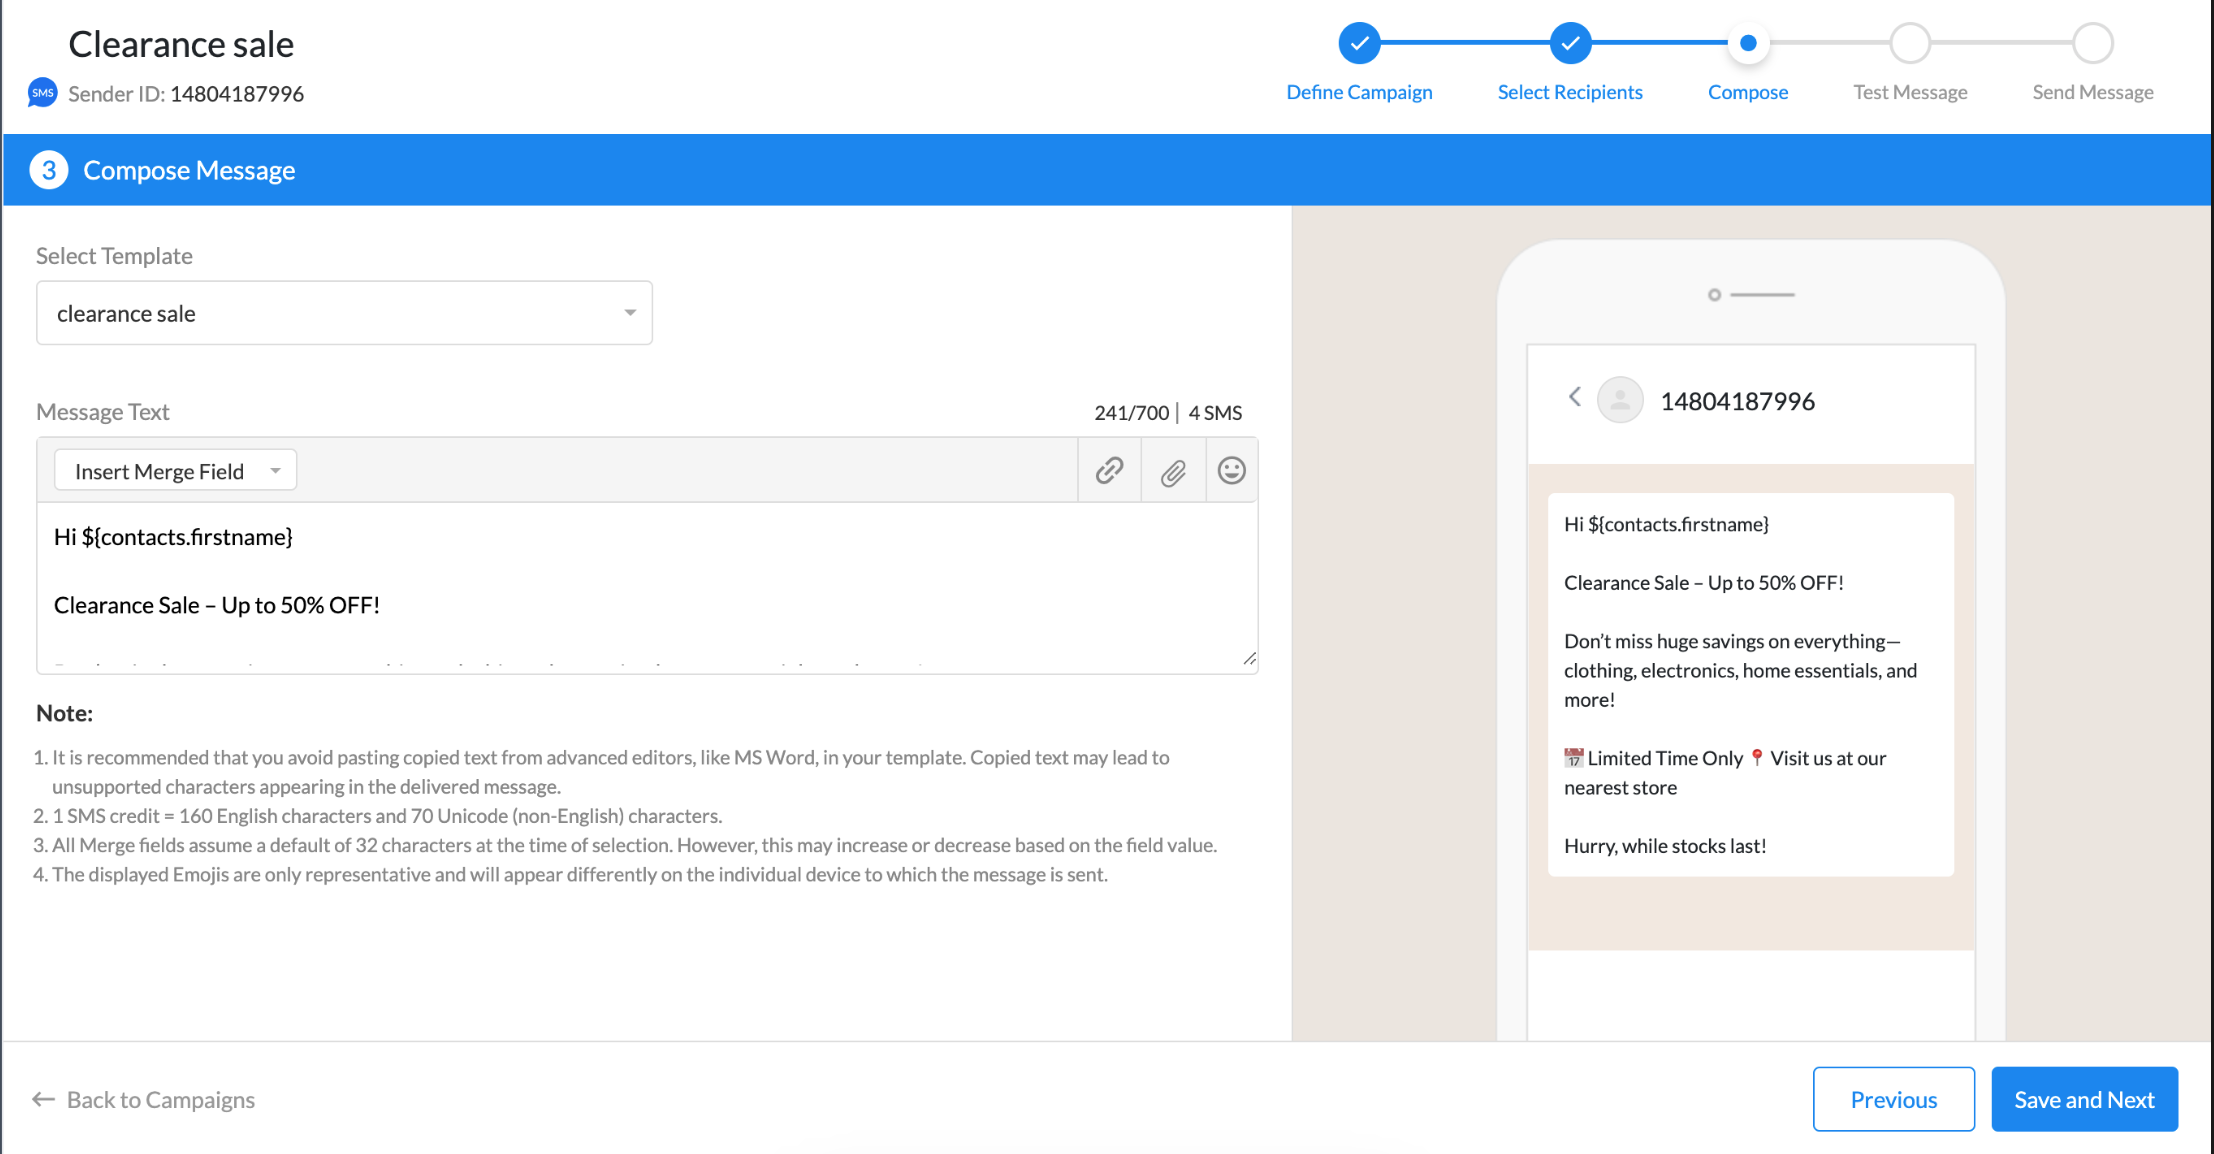
Step 8: Select a Template for Your Message
Choose a message template that aligns with your campaign goals.
You can preview the message in the message text box to ensure it meets your expectations.
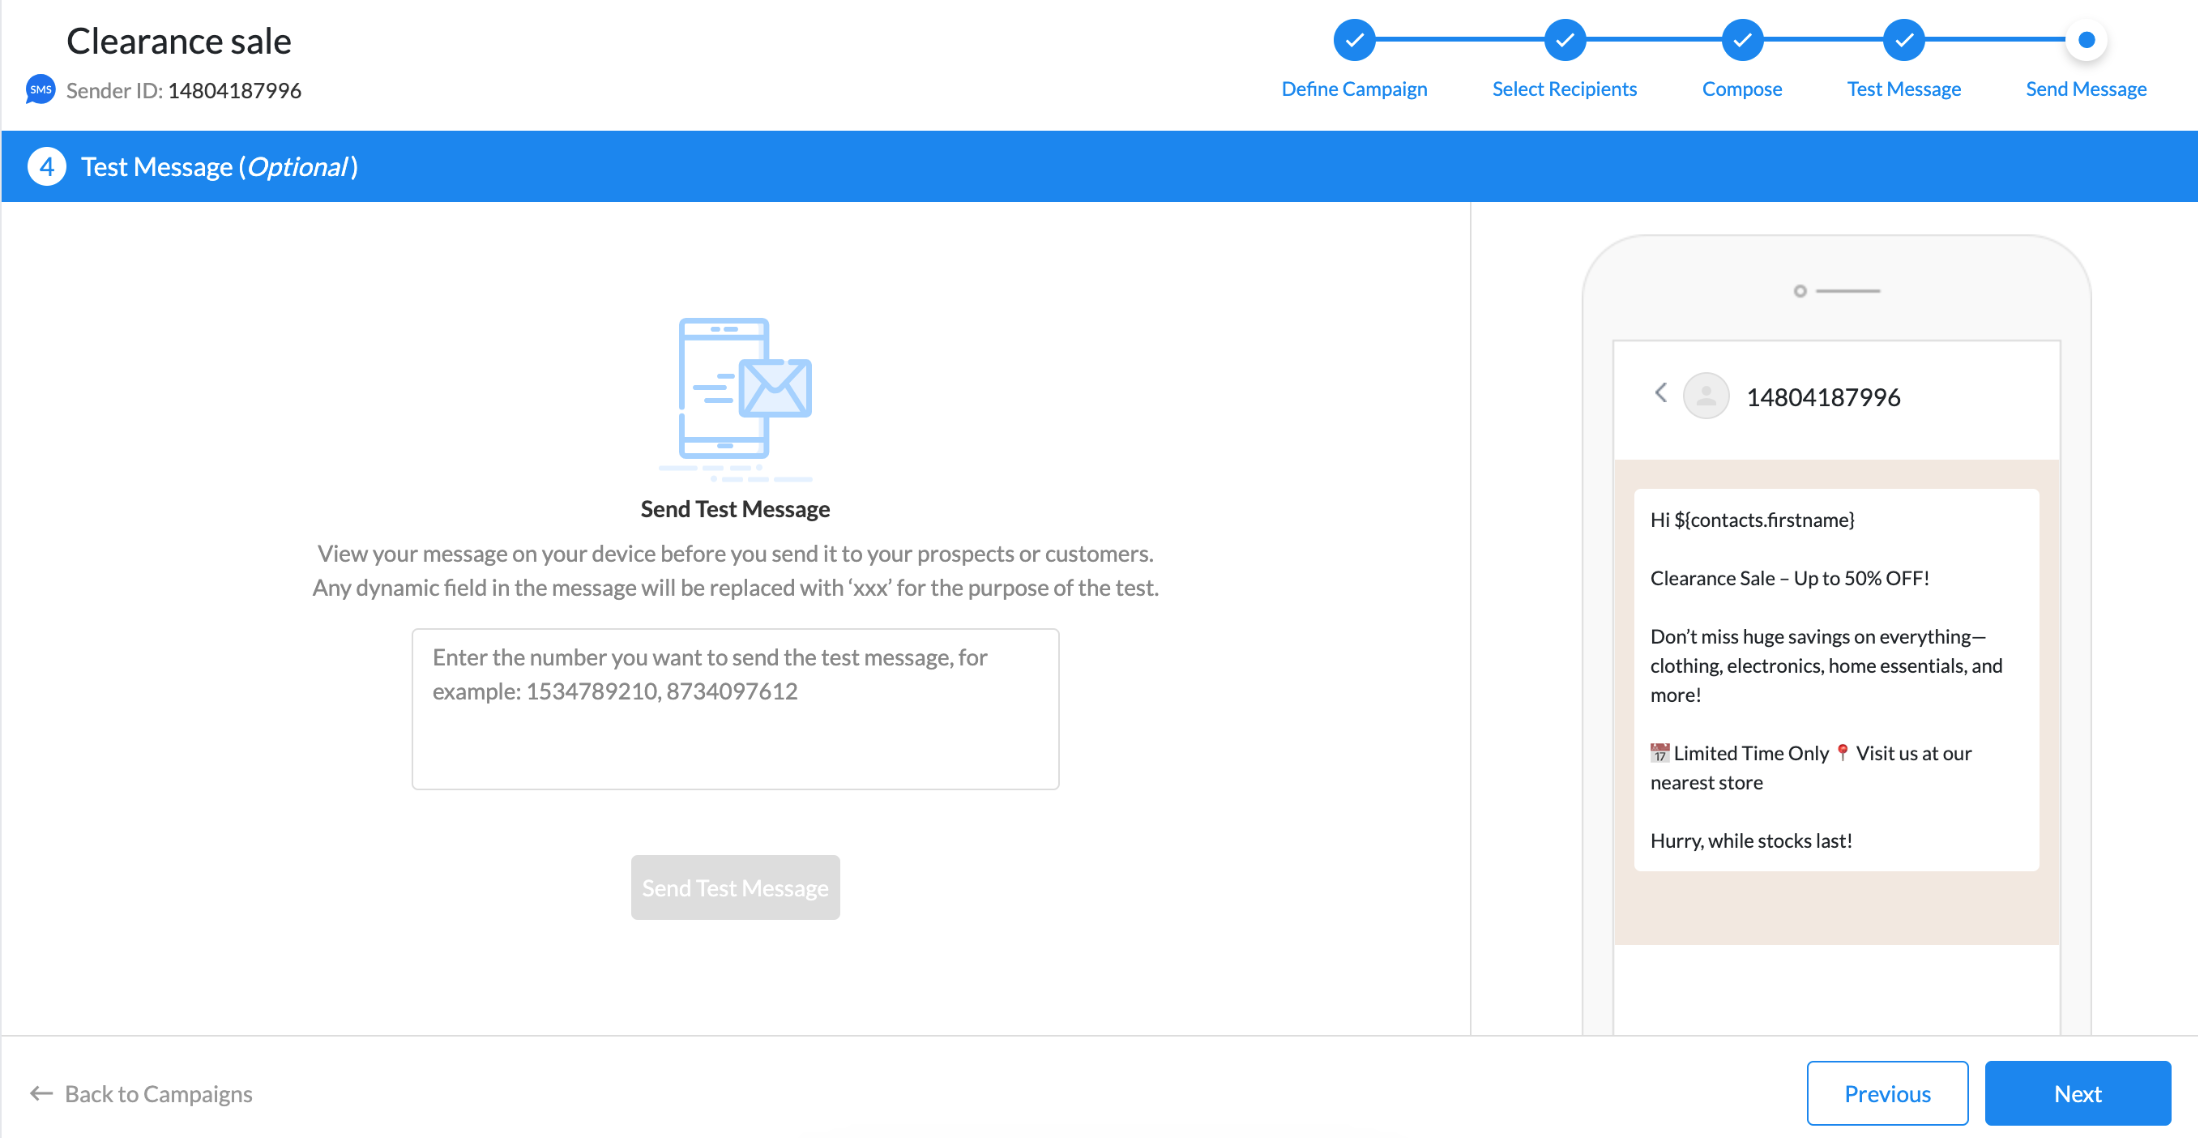
Step 9: Test Your Messages
Before finalizing the campaign, test your messages to check for errors or issues.
Step 10: Configure Campaign Settings
Determine the compliance settings for your campaign:
Send to All Users: Choose this option to send to everyone in the selected segment.
Opt-in Users Only: Select this if you only want to send to users who have opted in.
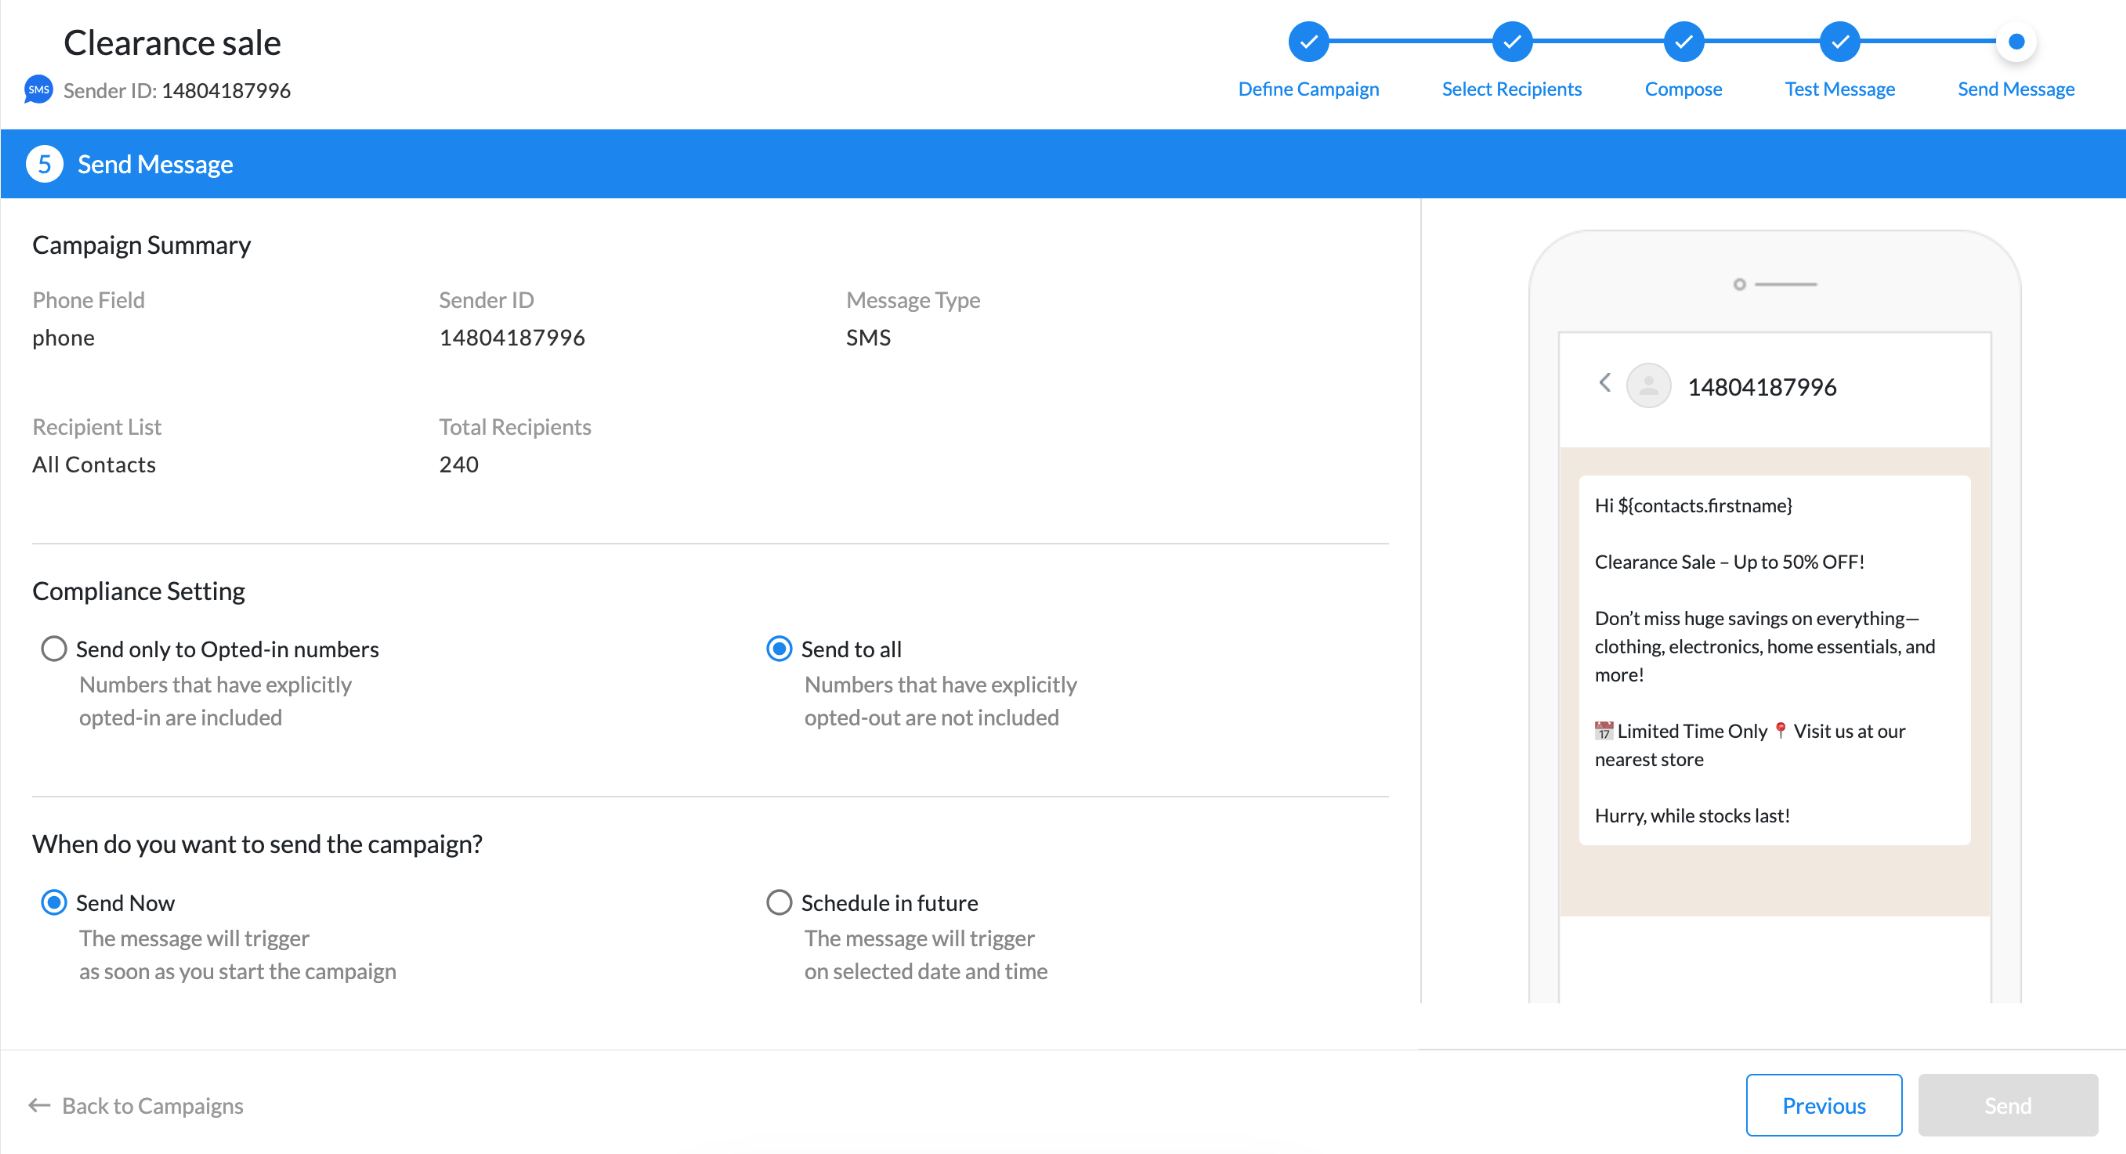
Step 11: Choose When You Would Like to Send Your Options.
Decide how you want to send the campaign:
Send Now: This option will immediately dispatch the campaign to the selected recipients.
Schedule for Future: Use this option to set a specific date and time for the campaign to be sent.
Step 12: Send Your Campaign
Review all configurations to ensure accuracy.
Once everything is set, click Send to launch your campaign.

Frequently Asked Questions
1. Can I edit and use the same segment to send the campaign?
Yes, you can edit an audience segment before sending a campaign. However, any changes made to the segment will apply to all future campaigns using that segment. Ensure the segment reflects your desired audience before sending.
2. Can I send all types of campaigns using a segment list?
Yes, you can use audience segments for all types of campaigns. Whether it's broadcast, slow-pace, or recurring campaigns, segments help you target specific groups for personalized messaging.

