Conversive and Creatio Detailed Setup Guide
This document provides a comprehensive, step-by-step guide to setting up Conversive with Creatio. It is intended for system administrators and technical users who need a reliable integration between the two platforms.
1. Prerequisites
Before starting the integration process, ensure you have the following:
Conversive Account with admin access.
Creatio Account with System Administrator privileges.
Conversive API Key and Region details.
Access to OAuth 2.0 settings in Creatio.
A predefined Sender ID created in Conversive (if applicable).
2. Setting Up OAuth Connection in Creatio
OAuth 2.0 ensures secure communication between Conversive and Creatio.
Steps:
Log in to Creatio as an administrator.
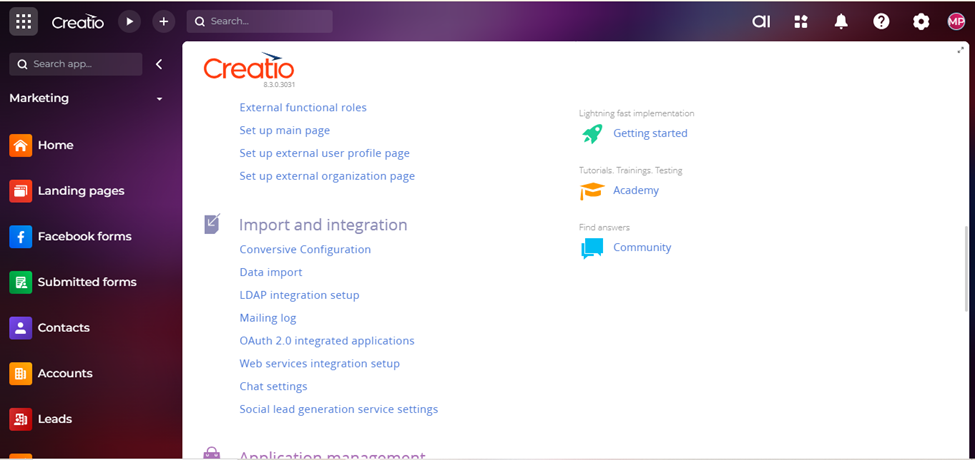
Navigate to: System Designer → Import and Integration → OAuth 2.0 Integration Application.
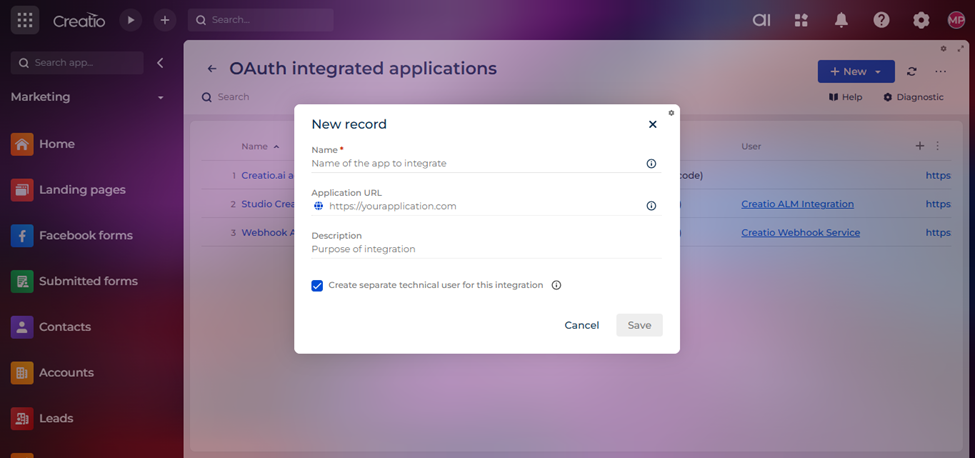
Click on the New button to create a new OAuth application.
Fill in the following fields:
Name: A descriptive identifier (e.g., "Conversive Integration").
Application URL: Enter the Conversive portal URL.
Description: Provide context for the integration (e.g., "OAuth for Conversive Messaging").
Save the configuration.
3. Retrieving Client Credentials from Creatio
Once the OAuth application is created:
Return to the OAuth list.
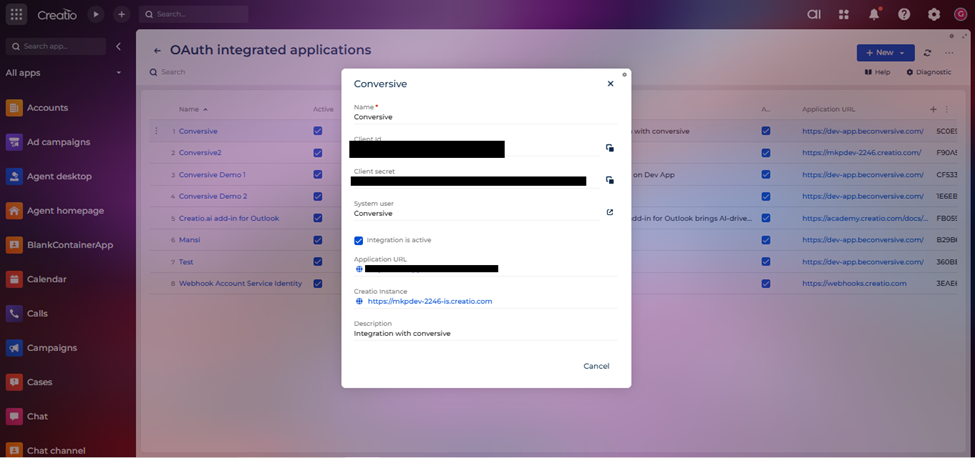
Select the newly added OAuth entry.
Copy the following credentials:
Client ID
Client Secret
Instance URL (your Creatio environment URL).
These credentials will be required in the Conversive portal.
4. Connecting Conversive to Creatio
With the OAuth credentials ready, configure the integration in Conversive.
Steps:
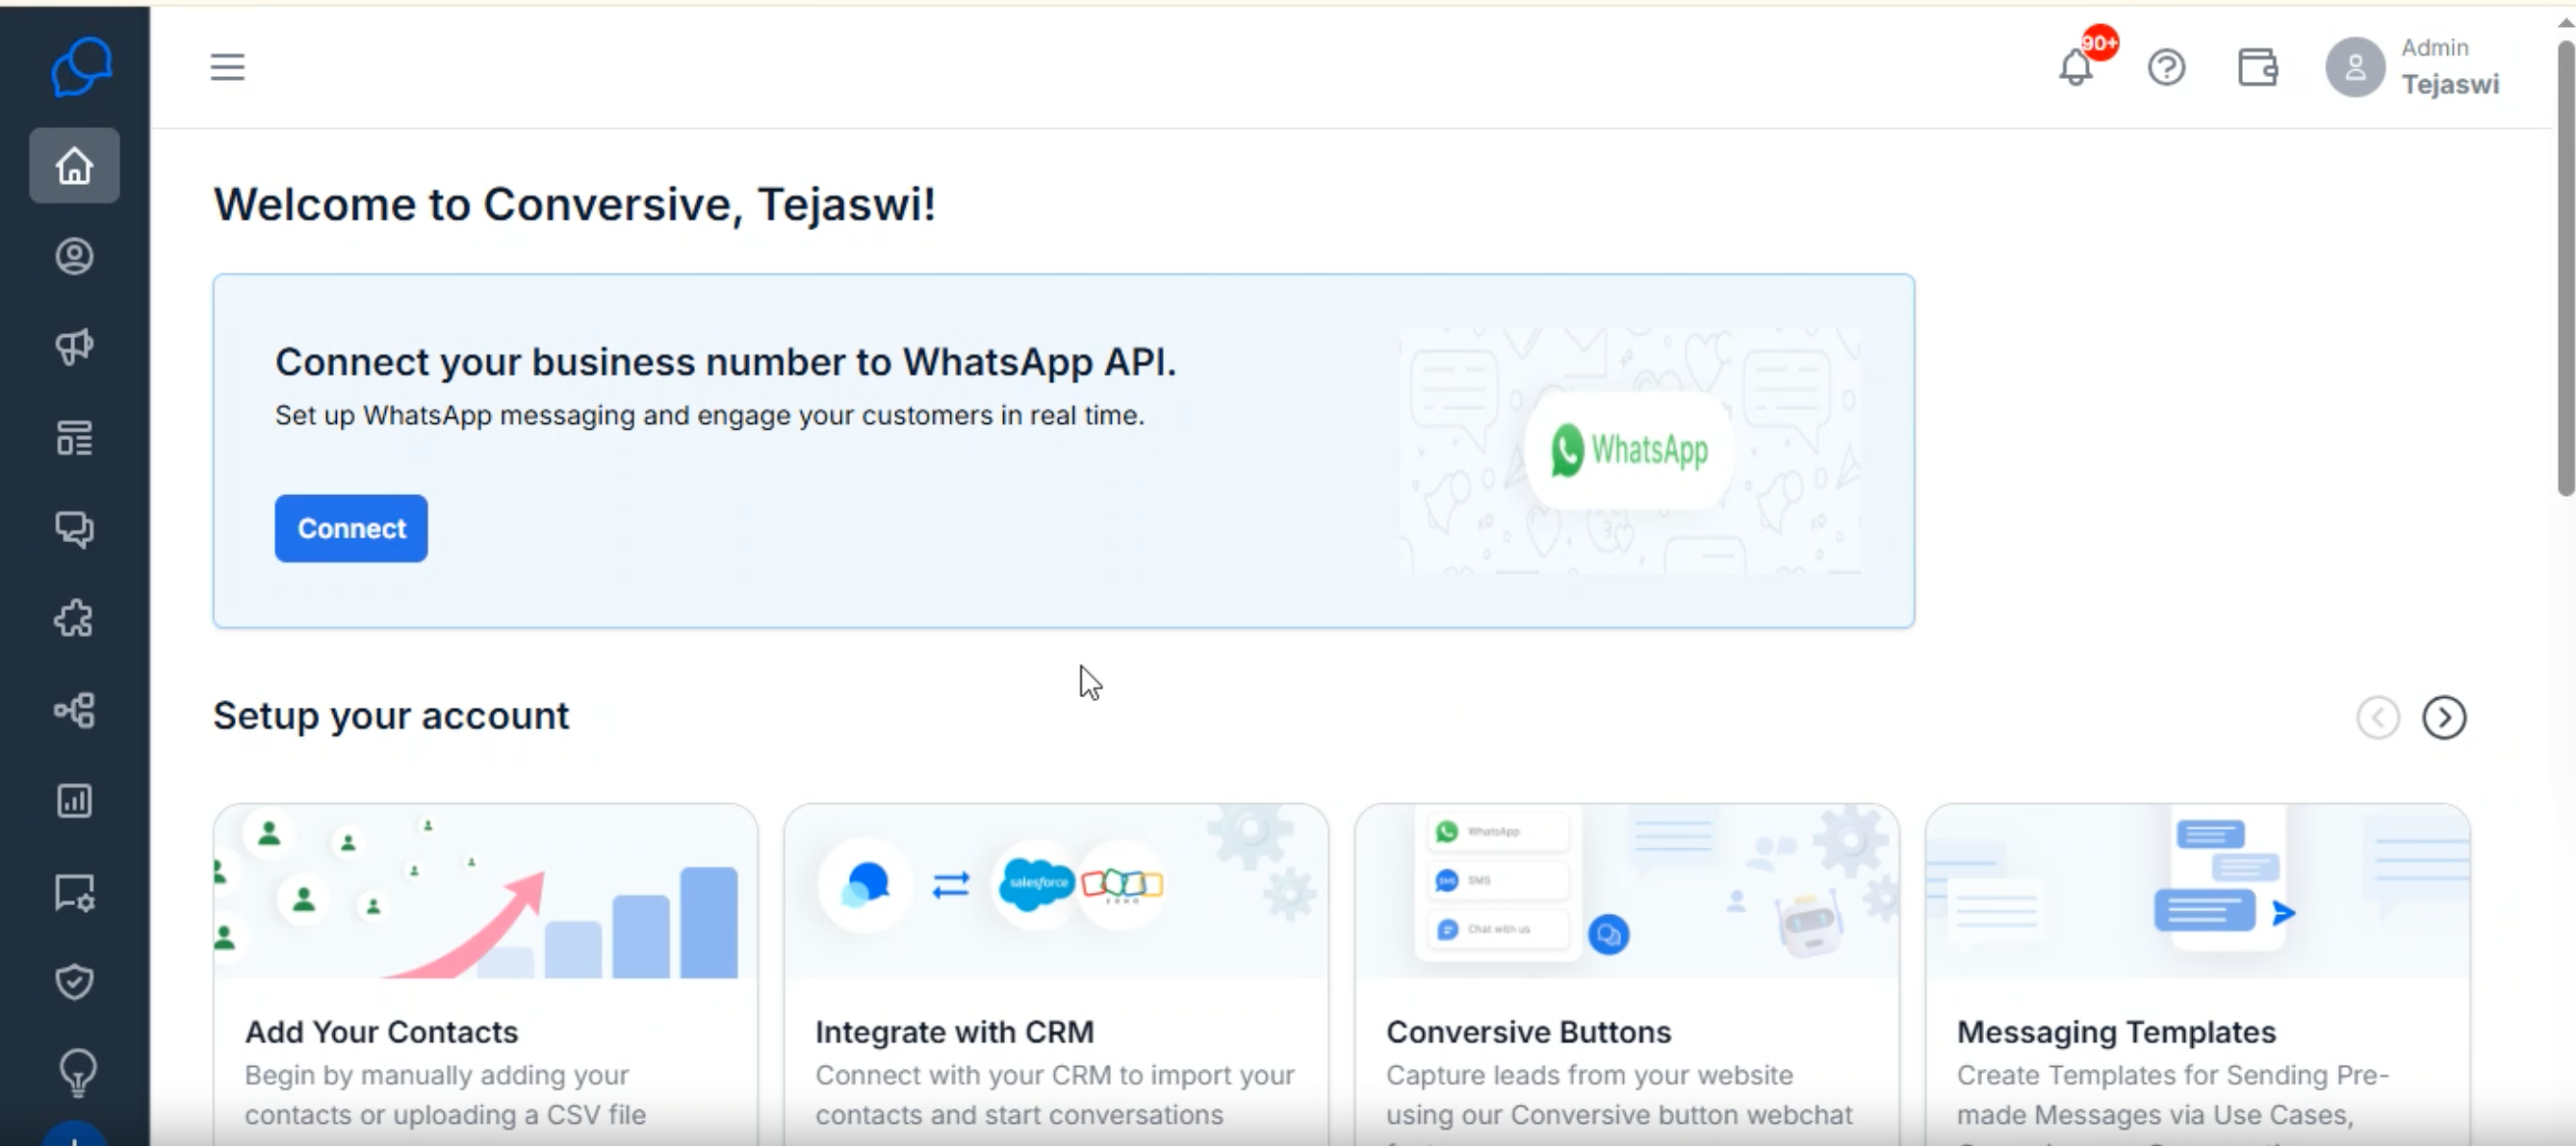
Log in to your Conversive account.
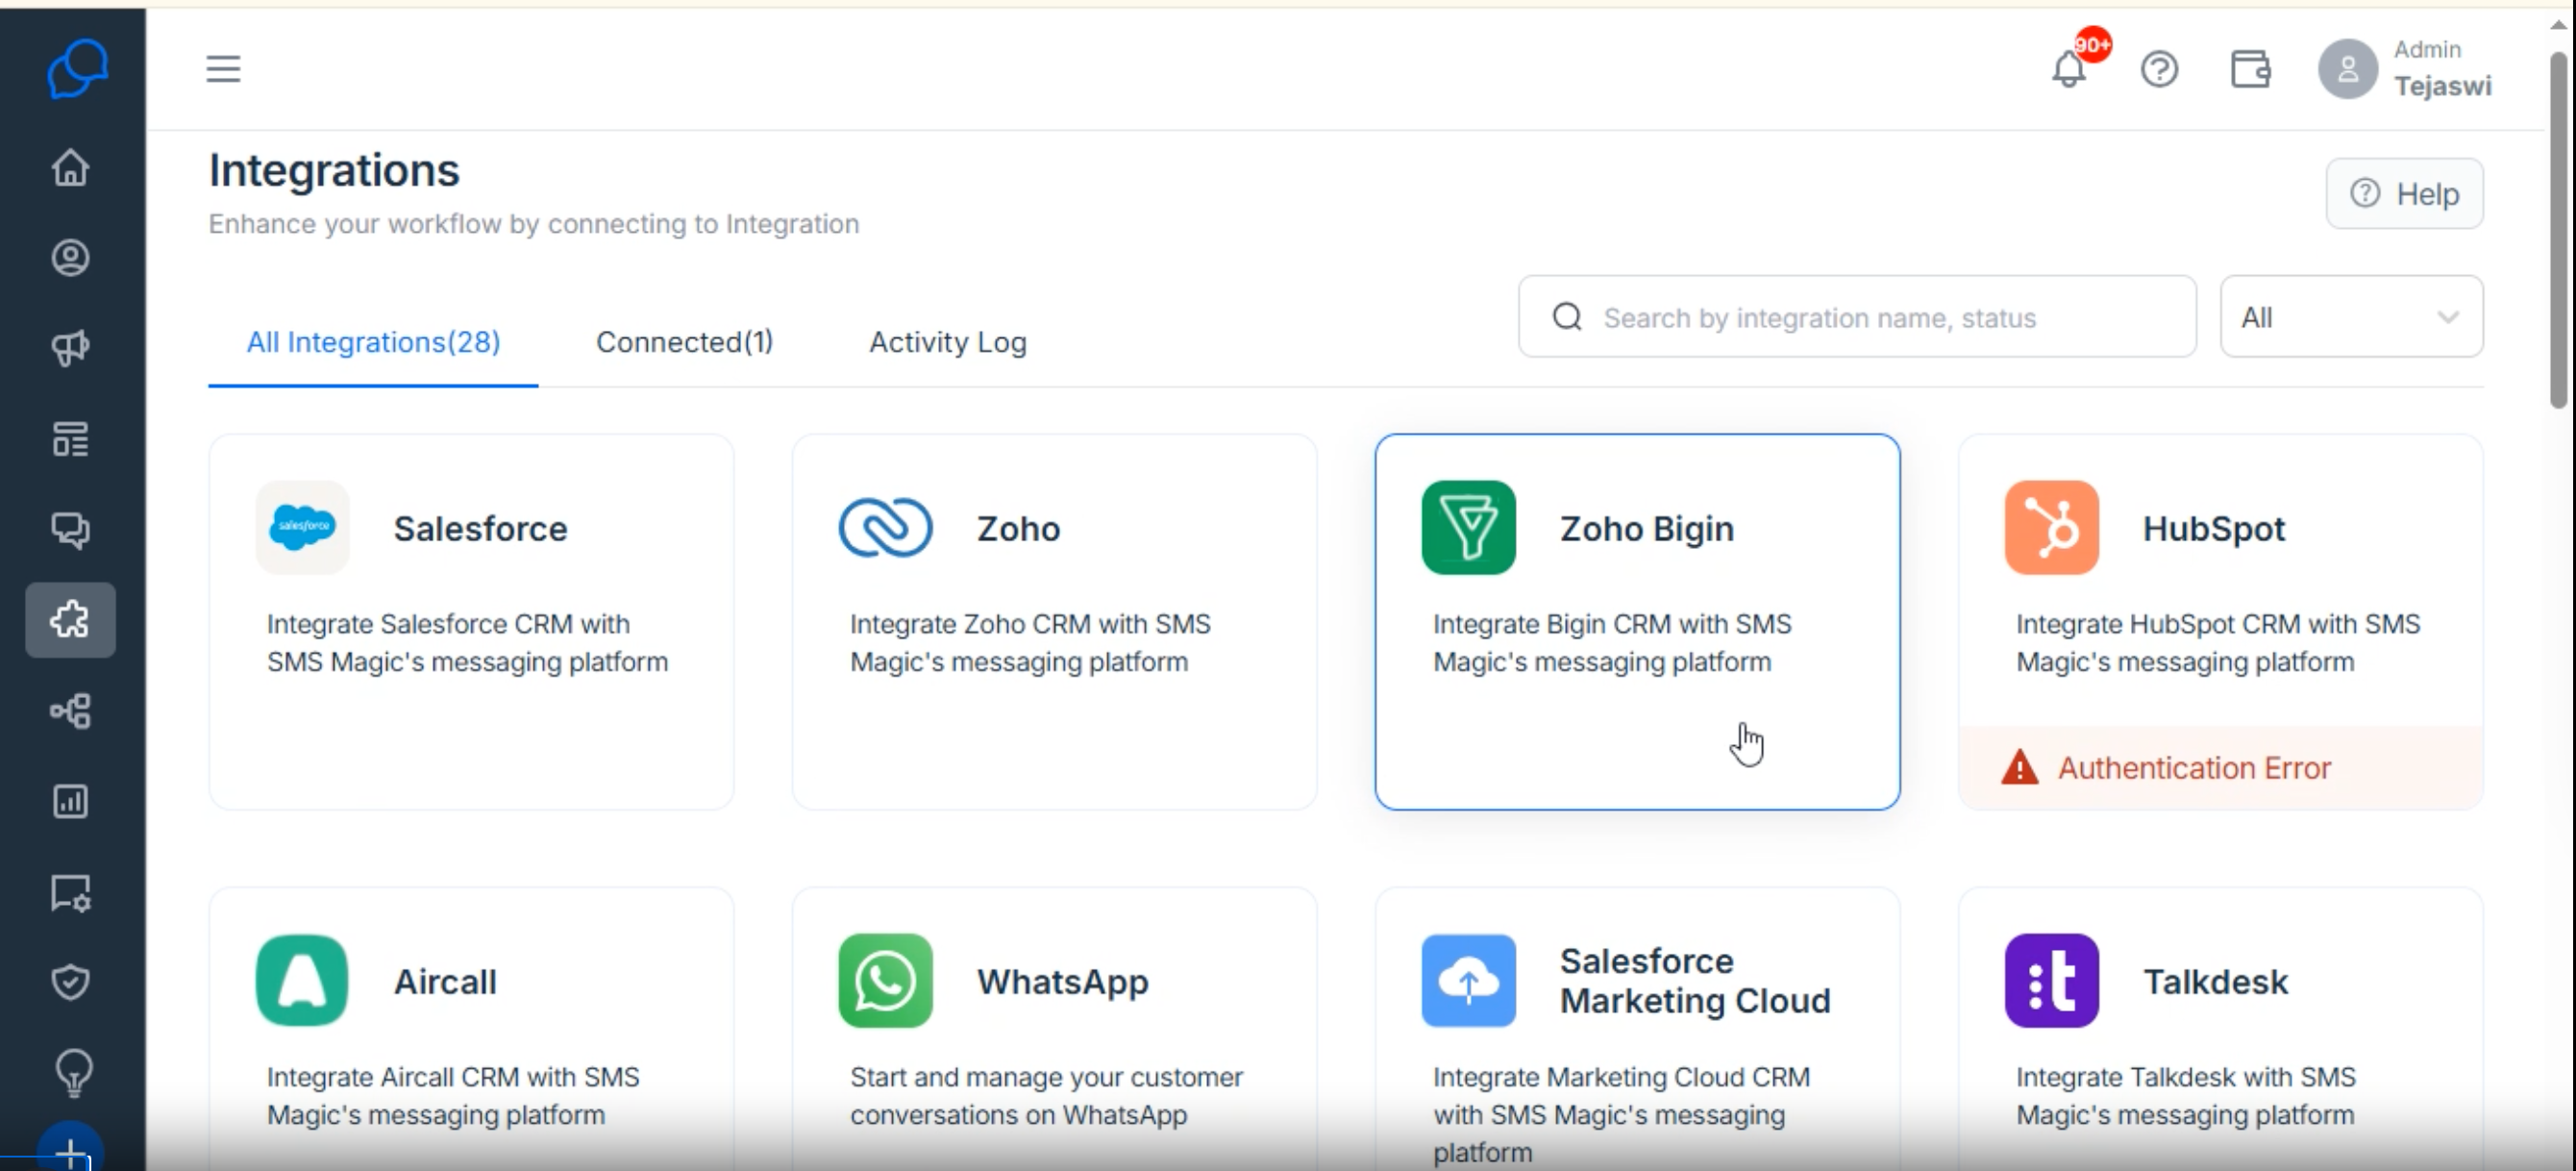
Navigate to Integration from the left-hand menu.
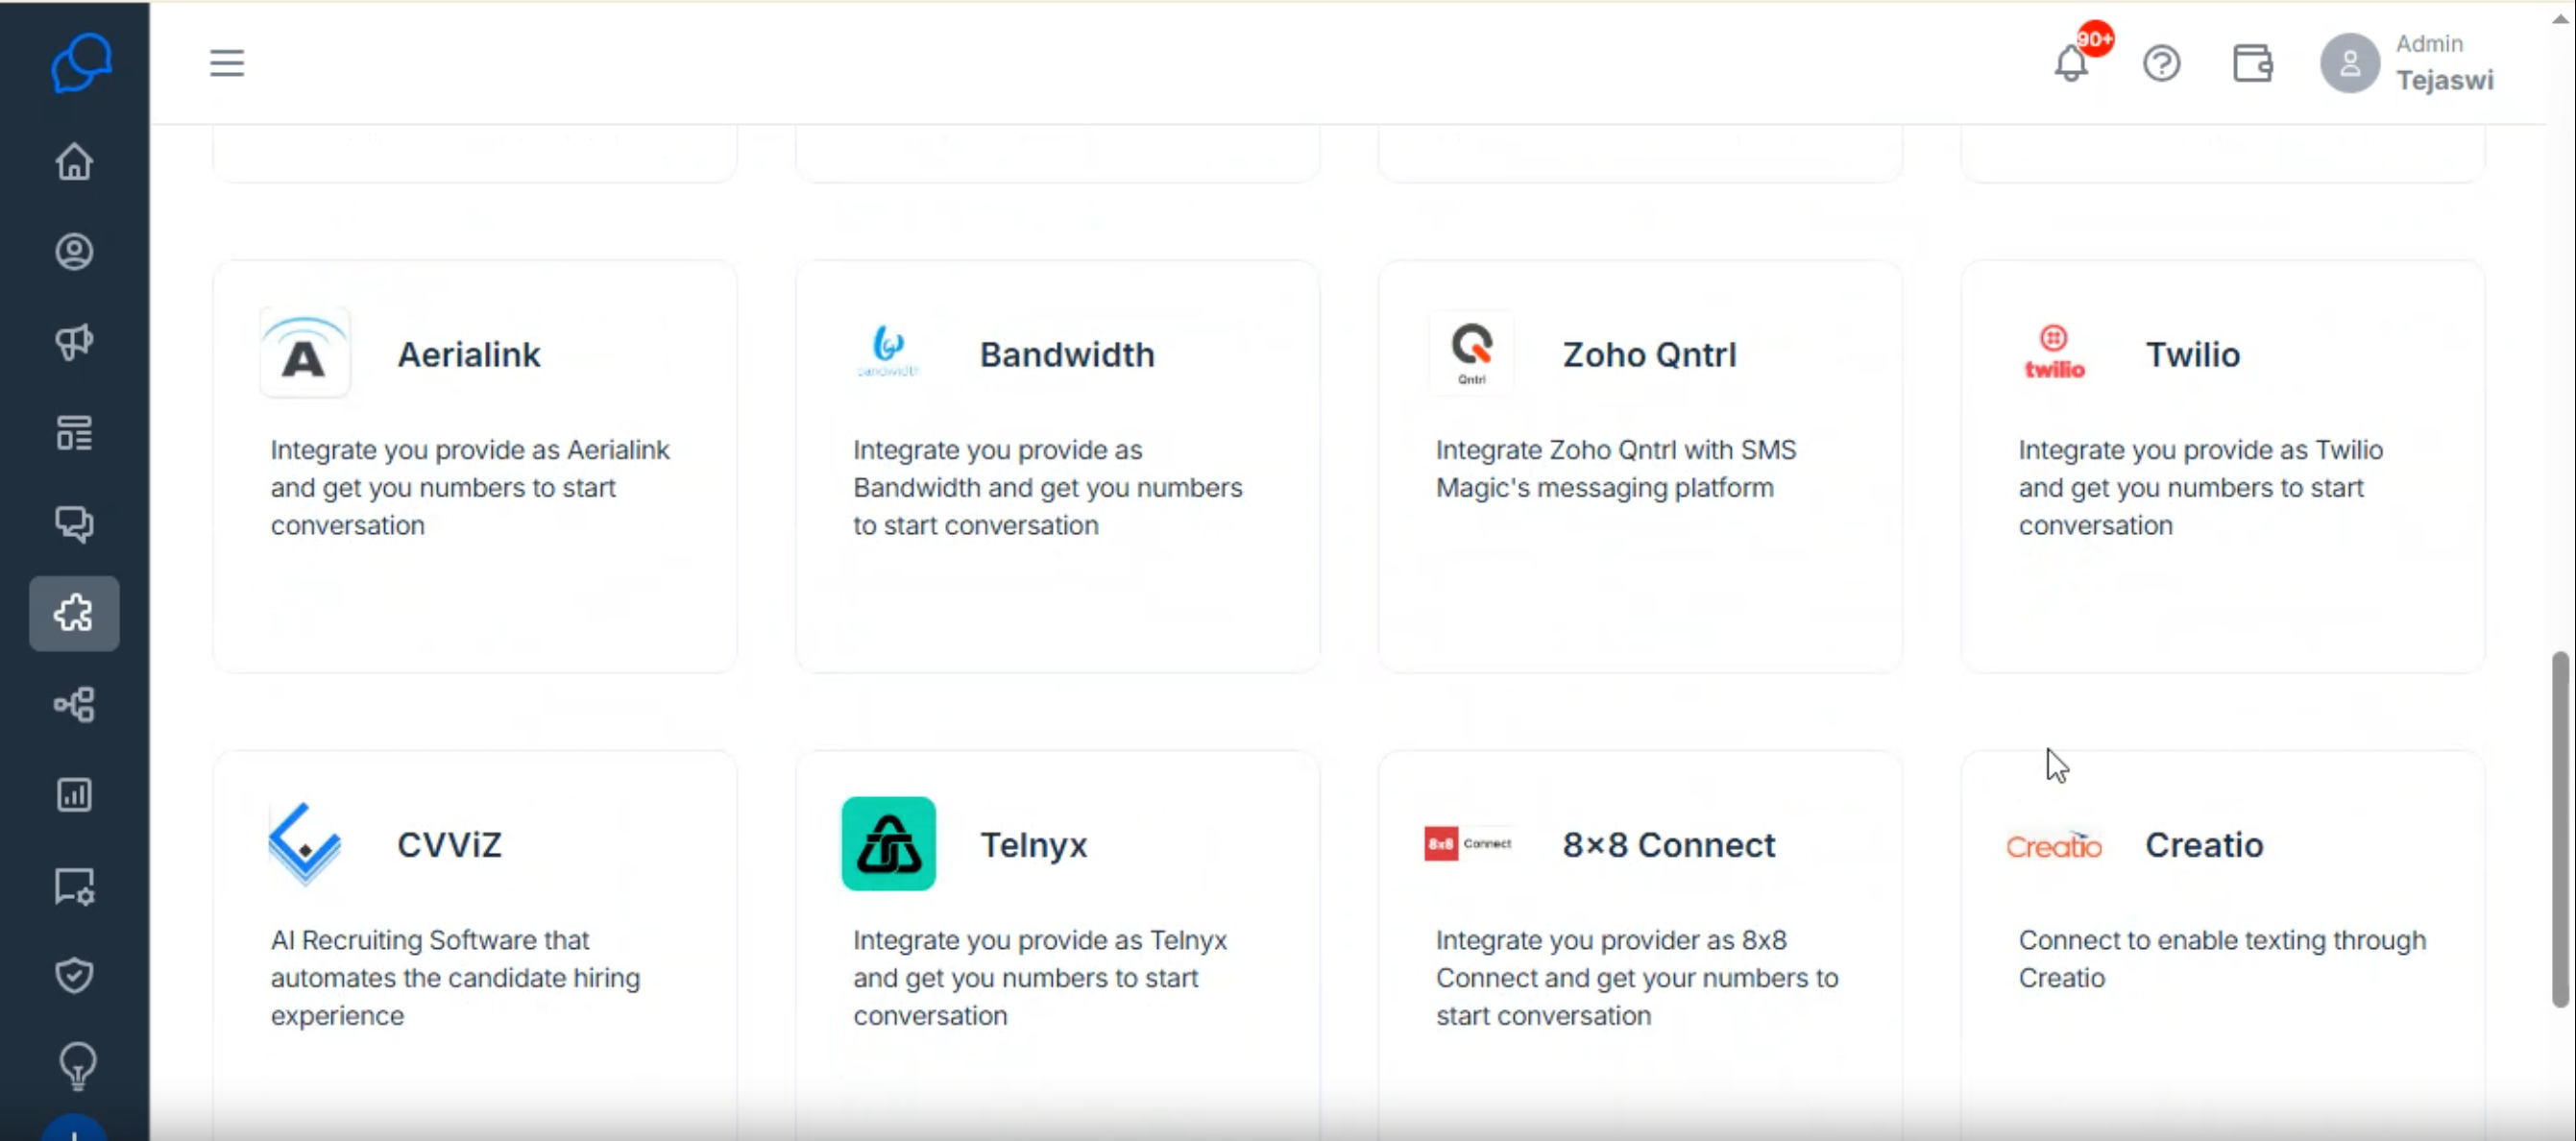
Locate Creatio in the list of available integrations.
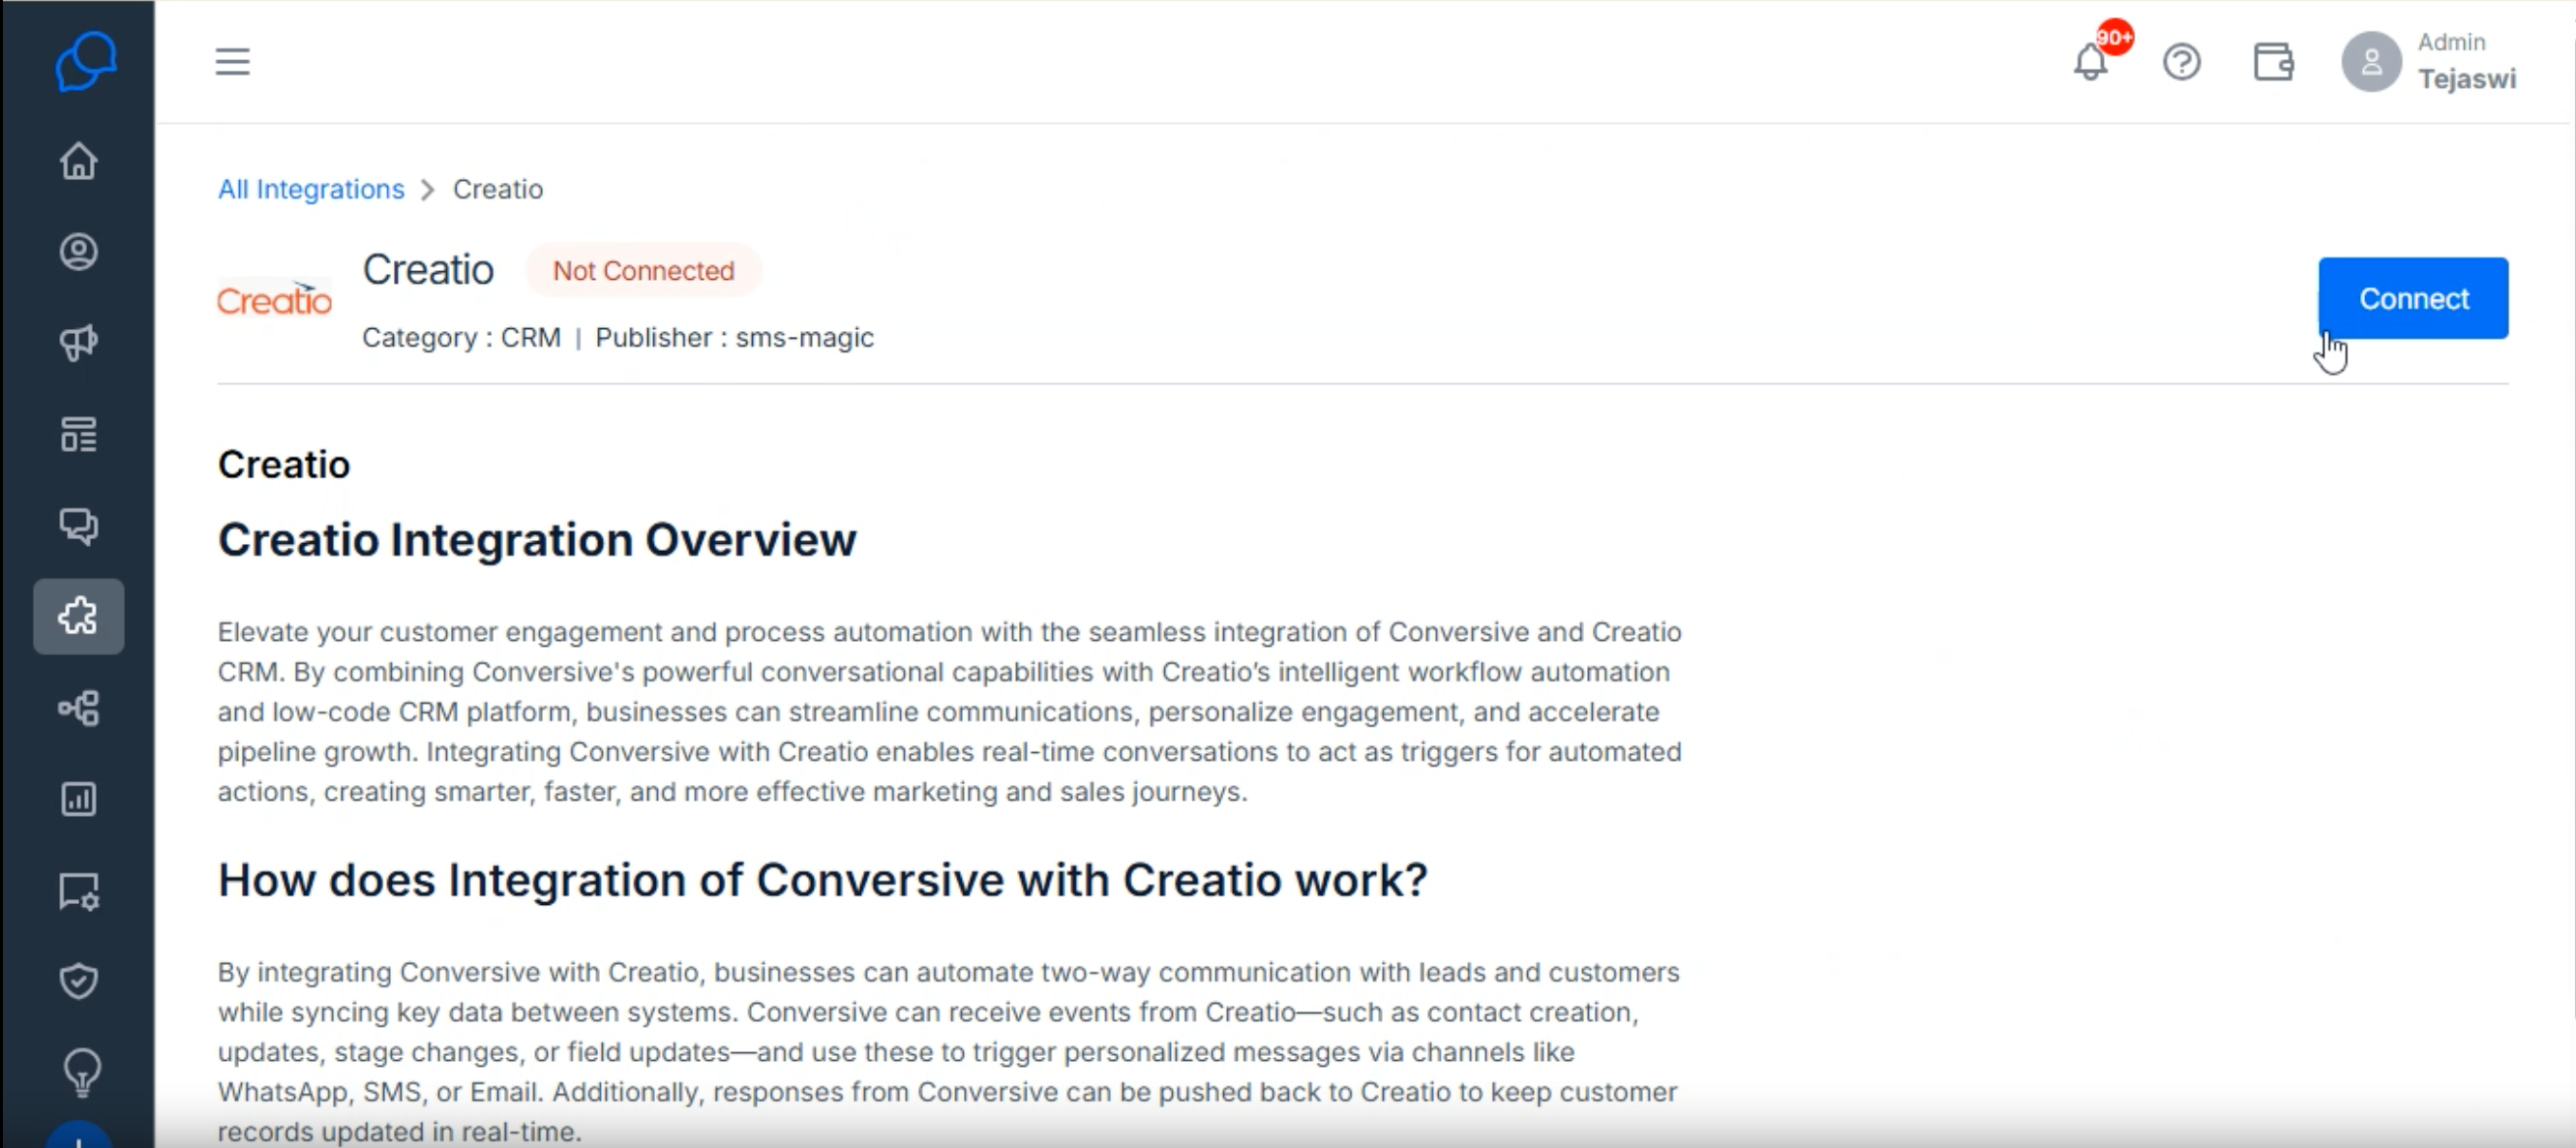
Click Connect.
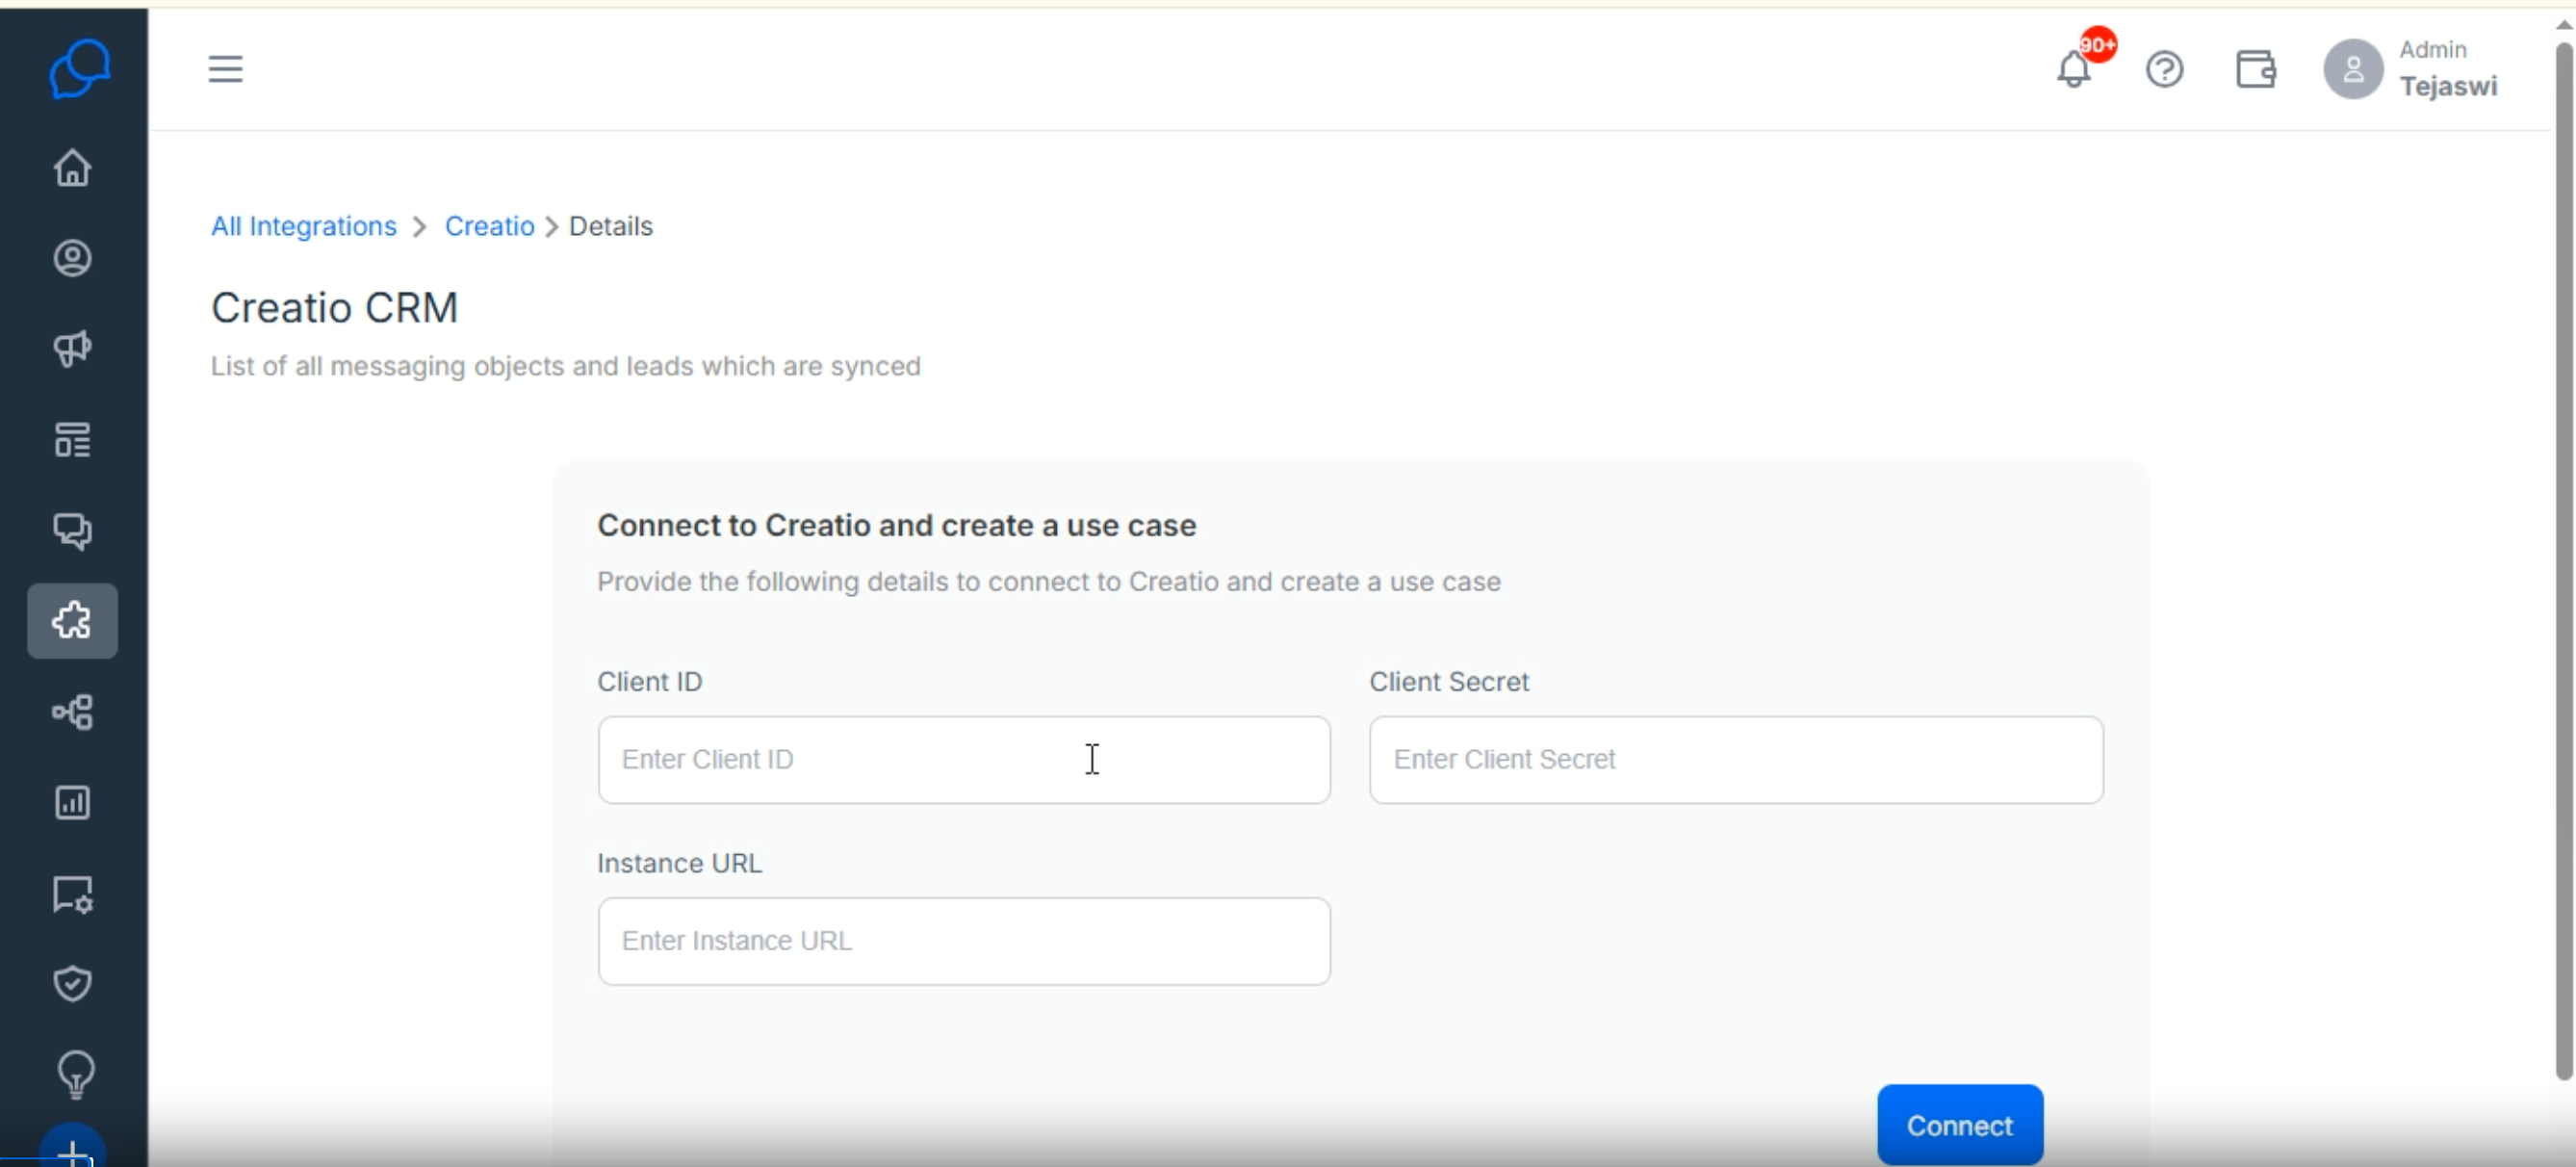
Enter the following details from Creatio:
Client ID
Client Secret
Instance URL
Click Connect to establish the integration.
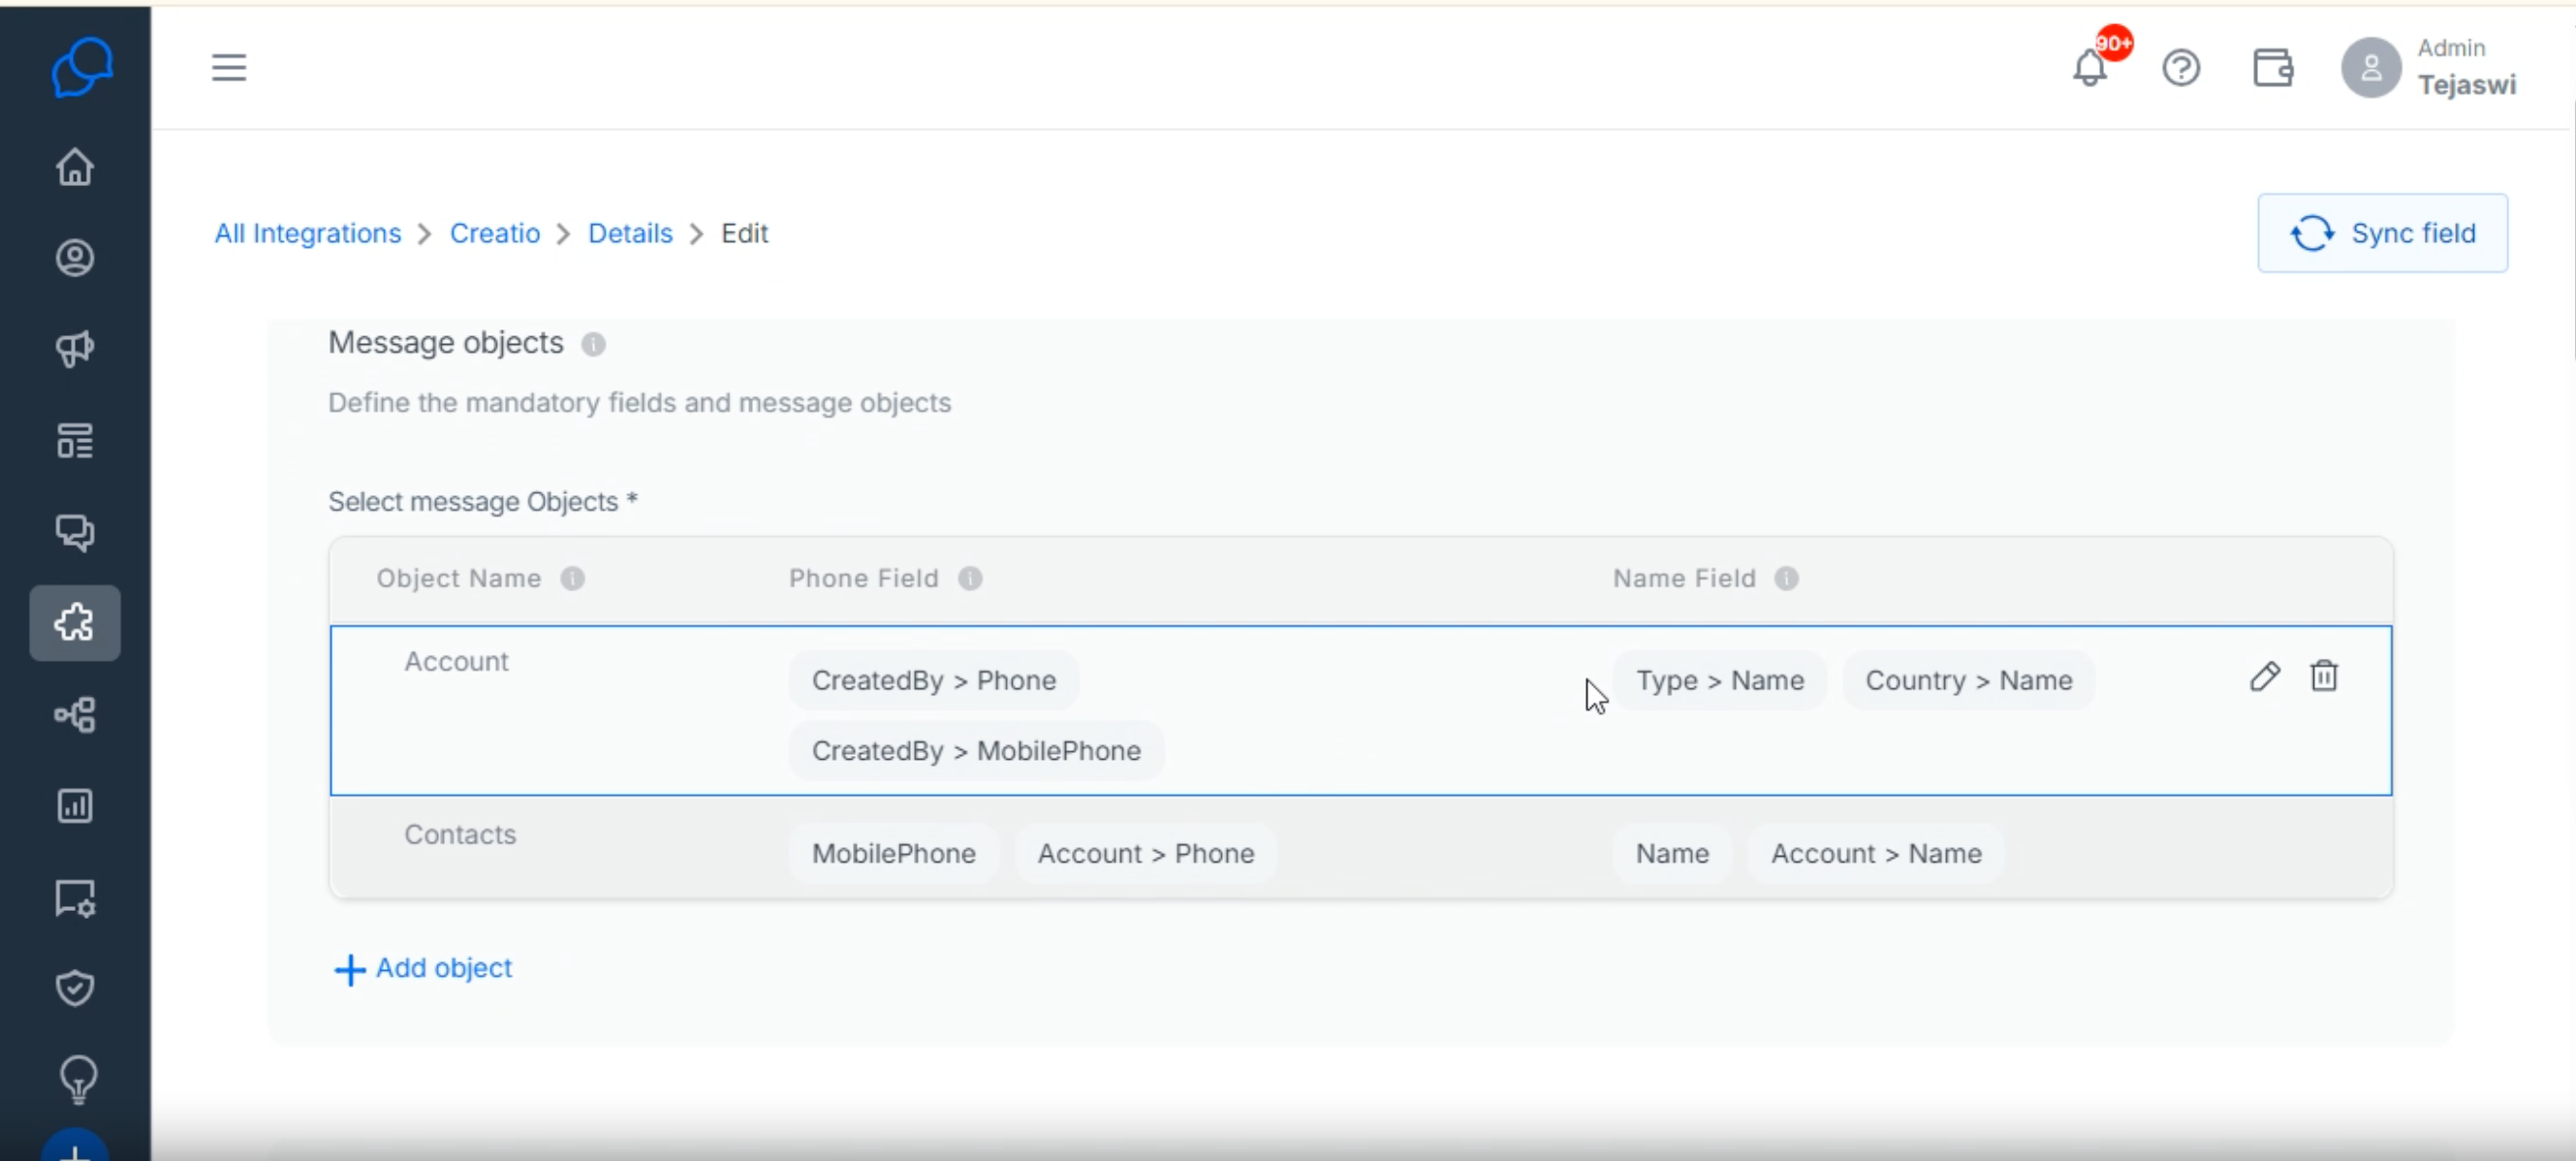
Configure field mappings:
Select Phone Fields (e.g., Primary Phone, Mobile Phone).
Select Name Fields (e.g., First Name, Last Name).
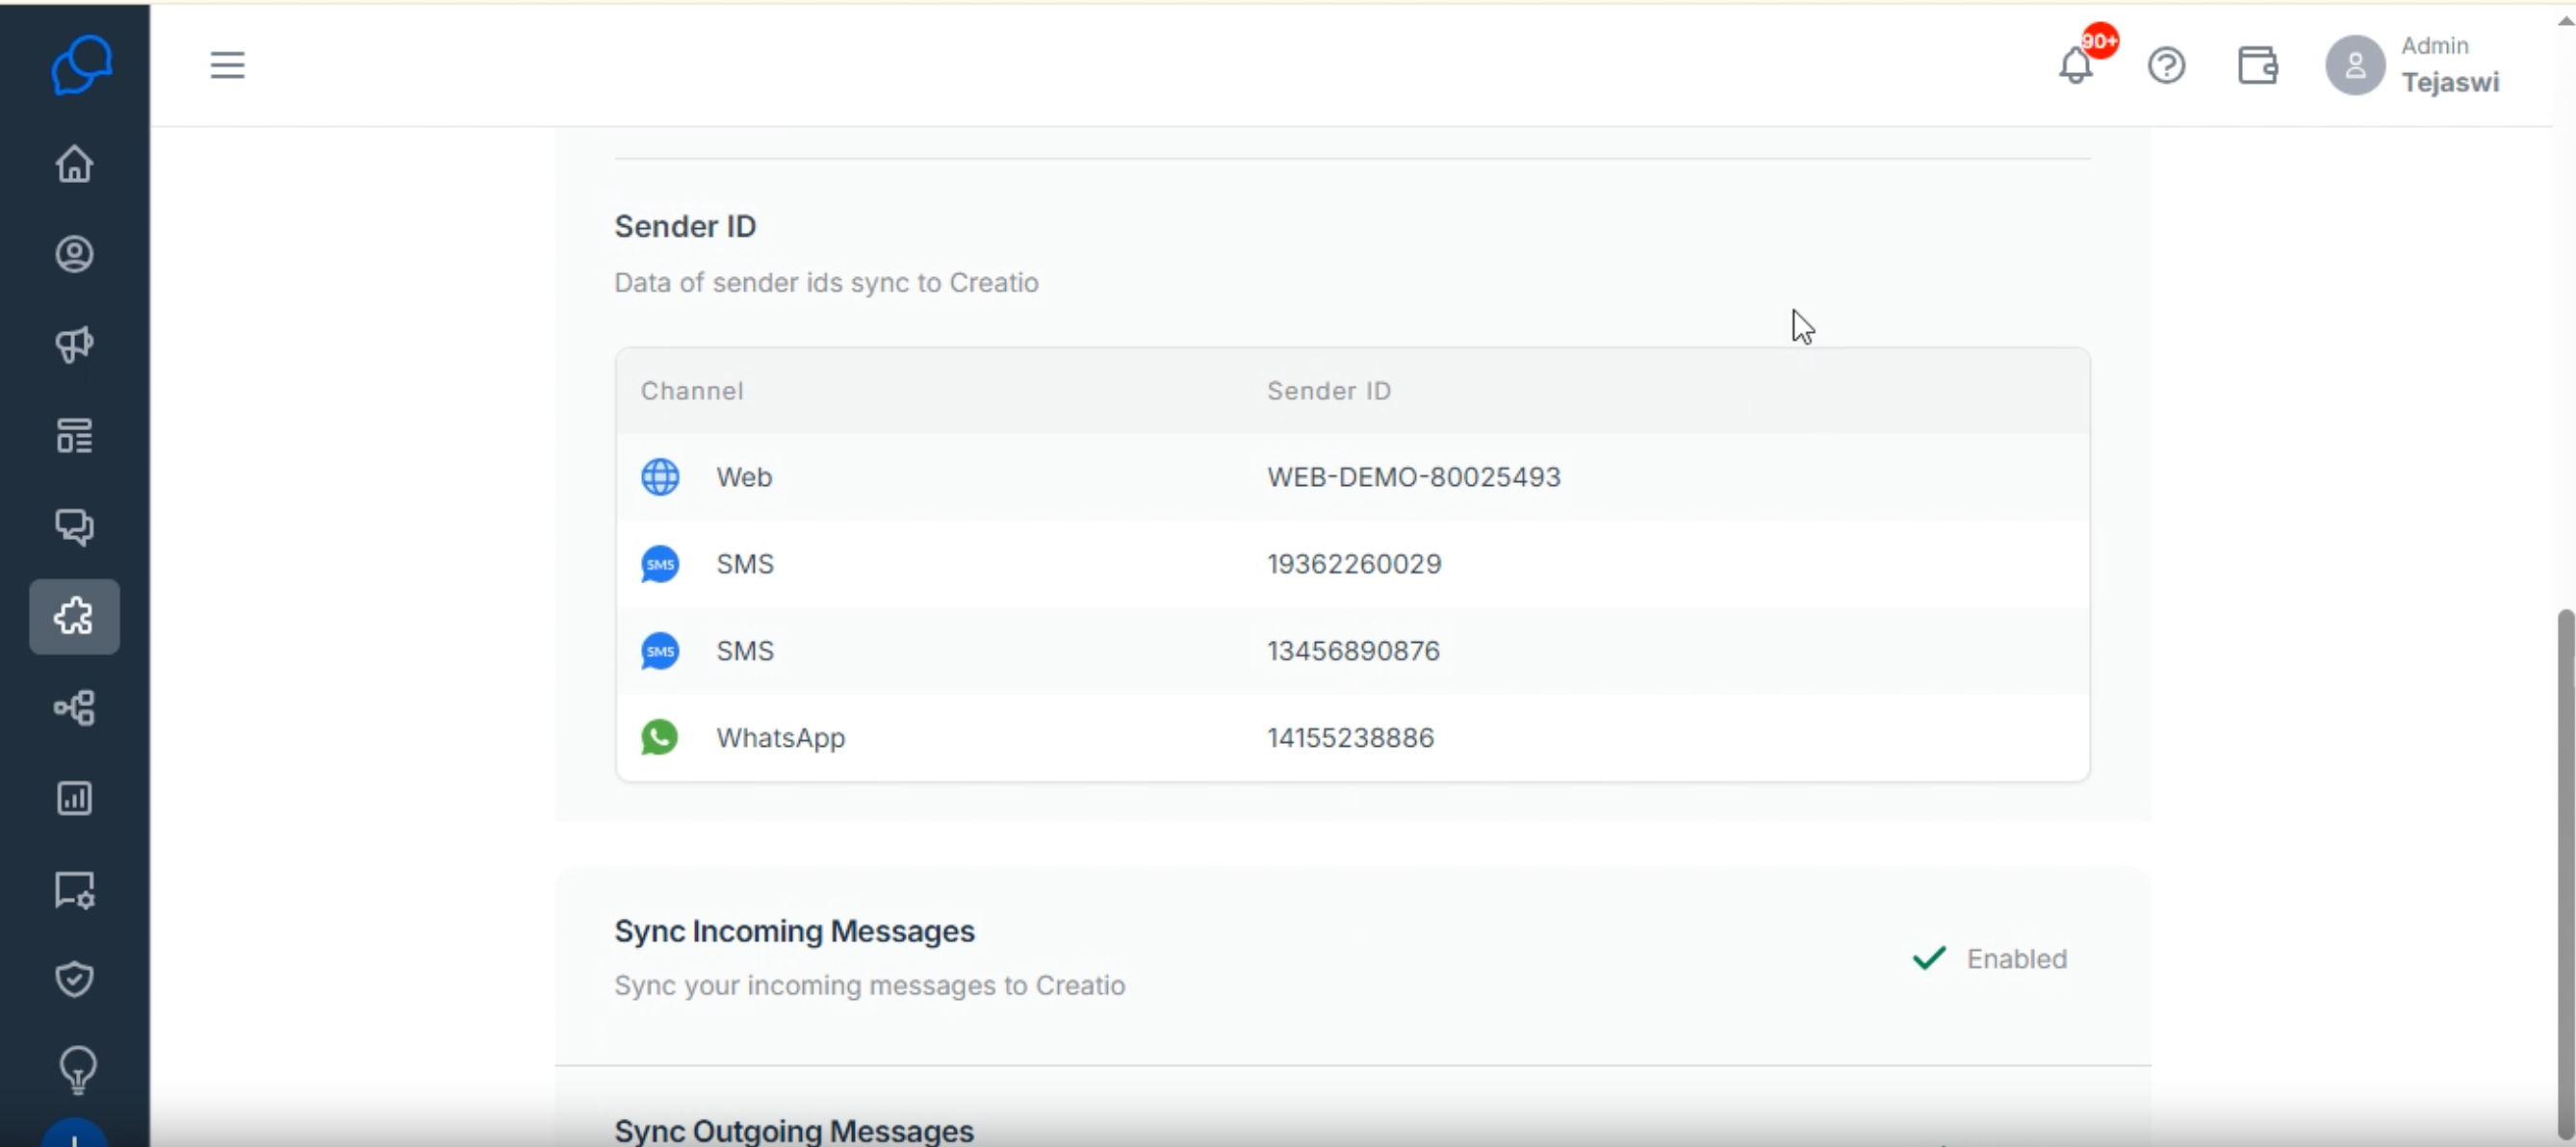
Choose the Sender ID that will be synced to Creatio.
Tip: Ensure that the fields chosen in Conversive match existing contact fields in Creatio for accurate synchronization.
5. Setting Up Conversive Configuration in Creatio
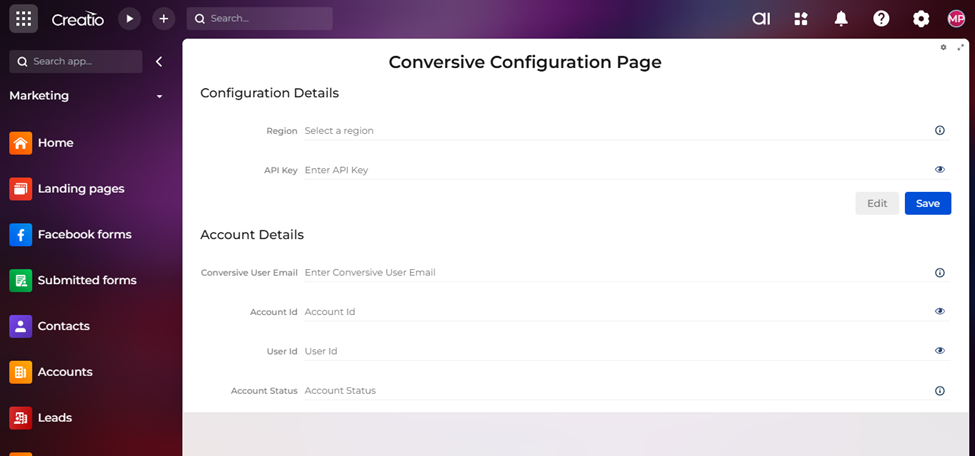
After establishing the connection, configure Conversive inside Creatio.
Steps:
Navigate to System Designer → Import and Integration → Conversive Configuration.
In the configuration dialog, enter:
Region: Provided in your Conversive account.
API Key: Generated from Conversive.
Save the configuration.
6. Configuring Sender ID in Creatio
To enable messaging, a Sender ID must be mapped.
Steps:
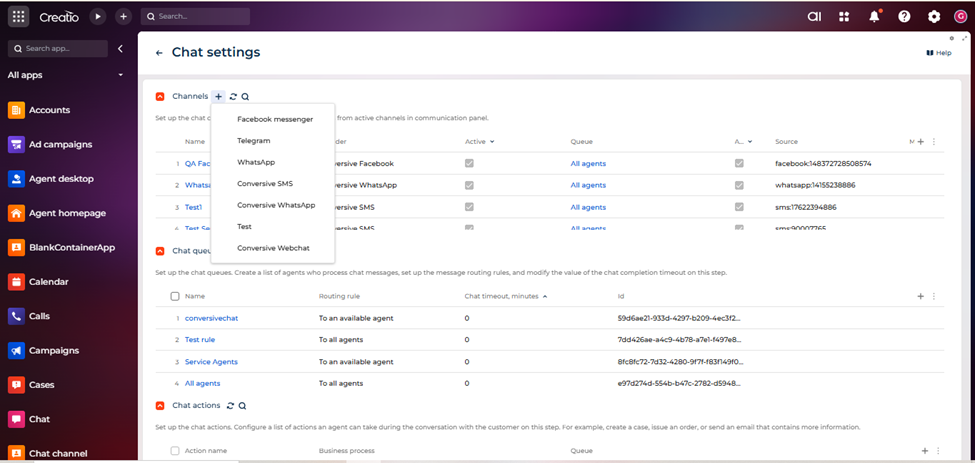
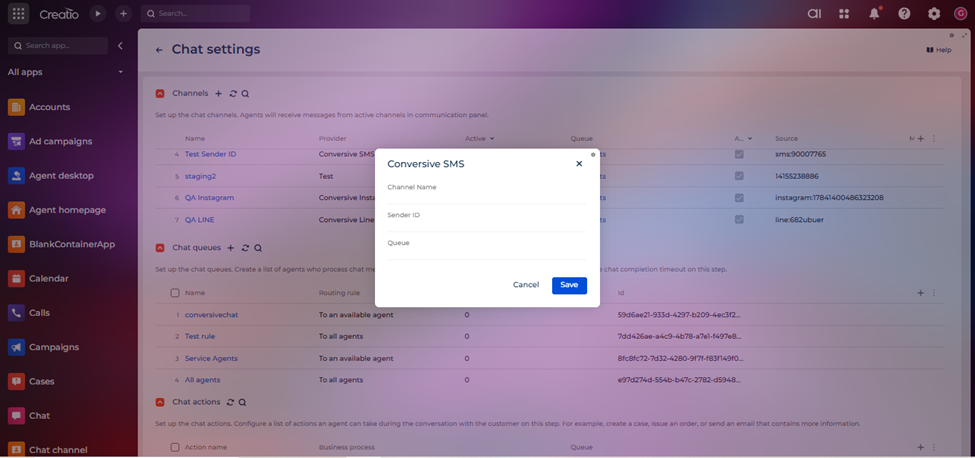
Navigate to System Designer → Import and Integration → Chat Settings.
On the Channels page, click the “+” icon under Channels (with Conversive prefix).
Select the appropriate Conversive channel (e.g., SMS, WhatsApp, RCS).
In the Sender ID configuration dialog, fill in:
Name: Unique name for this sender.
Sender ID: The ID provided by Conversive.
Queue: Assign to a specific queue if applicable.
Save the configuration.
7. Verification and Testing
To confirm the integration is working correctly:
Send a test message from Conversive.
Check if the message is received and logged in Creatio under the configured channel.
Verify contact synchronization:
Ensure phone and name fields appear correctly in Creatio.
Validate that messages are routed through the correct Sender ID.
Tip: Run tests with multiple contact records to confirm field mapping accuracy.
8. Troubleshooting
Here are common issues and their resolutions:
Invalid Client ID/Secret → Re-check OAuth credentials in Creatio.
Connection Timeout → Verify Creatio instance URL is correct and accessible.
Messages Not Syncing → Ensure field mappings are set correctly in Conversive.
Sender ID Not Working → Confirm Sender ID is active in Conversive and mapped in Creatio.
9. Summary
By following this guide, you have:
Created a secure OAuth connection in Creatio.
Configured Conversive integration with Creatio.
Added API Key and Region in Creatio for Conversive.
Set up Sender IDs for communication channels.
You are now ready to use Conversive seamlessly within Creatio for campaigns, customer conversations, and automated messaging.

